Stream Oracle changes to ClickHouse in real time with Redpanda Connect
A hands-on walkthrough of our new Oracle CDC connector
Learn how to implement CDC in Postgres, leveraging its logical replication feature using Debezium with Redpanda.


UPDATE, 2026: This tutorial uses Debezium with Kafka Connect to capture changes from Postgres. However, Redpanda Connect now offers native CDC inputs for Postgres, MySQL, MongoDB, SQL Server, Oracle, DynamoDB, and TigerBeetle. It deploys as a single binary with YAML configuration. No JVM, no Kafka Connect runtime, and no connector plugins to manage. See the CDC connectors overview for a comparison.
Postgres is a popular open-source database management system many organizations use for various data needs. Postgres provides multiple methods for implementing change data capture, including trigger-based CDC and its logical replication features.
The data changes captured ship to data warehouses or other applications that rely on the same data without necessarily having to directly grant access to the database to read or make modifications. Changes streamed to these applications may transform the data and be used for various purposes. Real-time data analytics and visualizations, notifications, and reporting and alerting systems are just a few potential use cases.
There are many practical use cases for implementing CDC in your Postgres database. One example is capturing user address changes in a real-time GPS-based delivery system where packages are sent to the user's current location or address. Anytime the user moves from one address to another, the changes made to the database are reflected via notification and shown on the courier's map in real time so they can act accordingly. Other adjustments can also happen on the fly, like recalculating delivery fees.
Another use case is an online reservation platform for a hotel. Here, the availability of rooms in the hotel must accurately reflect on-premise and online reservations in real time. Anytime changes are made to a reservation, all other aspects of the system must automatically reflect the change to data in real time, without having to do a refresh or direct read from the database. This real-time CDC ensures information viewed and decisions made on the system are based on current data.
This tutorial focuses on understanding and implementing CDC in Postgres. We will leverage its logical replication feature using Debezium with Kafka ConnectⓇ and Redpanda, which is Apache KafkaⓇ API-compatible.
While the technologies used in this tutorial are quite popular, little to no documentation exists that explains how to use them in this combination. You can access the demo code needed to complete this tutorial in the GitHub repo here.
This tutorial favors the inbuilt Postgres output plug-in over other Postgres plug-ins and is ideal for situations where you may not have access to build other supported plug-ins. As such, you should be using a minimum version of Postgres 10.
The tutorial demo demonstrates how to configure and use each component, bringing them together to achieve a working implementation of CDC with Postgres.
Below is a diagram of the architecture to be achieved by this tutorial.

For this tutorial, you will need to have the following installed:
I created this tutorial on a machine powered by a Fedora 36 Server edition.
The config files used in this tutorial can all be found in the GitHub repository. You can clone the repository to use it to speed up your learning process and make modifications where necessary for your testing.
Docker is a containerization platform that allows developers to easily deploy or test run applications in stand-alone environments known as containers without necessarily having to worry about the dependencies, language or framework versions, etc. of setting up on an actual system.
Below is how you can get Docker set up quickly on a Fedora 36 Linux box:
$ sudo dnf install docker docker-compose -y
$ sudo systemctl enable docker
sudo:$ sudo usermod -aG docker username
$ sudo systemctl reboot# setenforce 0
Redpanda is a streaming data platform that is Kafka API-compatible without the baggage of ZooKeeper and JVMs. This tutorial will not cover how to install or set up Redpanda - all that is in the documentation here. However, to follow along, you must ensure that you set up a three-node cluster.
The cluster should allow the auto-creation of topics by running the command below from the shell of the lead or main node:
$ rpk cluster config set auto_create_topics_enabled true
If your Redpanda cluster is running on Docker, you must first enter the main node's shell before running the command above. Refer to the code below for how to do this. Make sure to replace redpanda-1 with the actual container name.\
$ docker exec -it redpanda-1 /bin/bash
As mentioned in the introduction of this tutorial, you'll be learning how to use the logical replication feature of Postgres for CDC.
I used the official Postgres Docker image for this purpose, but with a modified configuration file to enable the logical replication feature to work with Debezium. Extensive documentation on this by Debezium can be found here.
Create the file pgconfig.conf in your current directory with the content below:
# LOGGING
# log_min_error_statement = fatal
# log_min_messages = DEBUG1

# CONNECTION
listen_addresses = '*'

# REPLICATION
wal_level = logical             # minimal, archive, hot_standby, or logical (change requires restart)
max_wal_senders = 4             # max number of walsender processes (change requires restart)
#wal_keep_segments = 4          # in logfile segments, 16MB each; 0 disables
#wal_sender_timeout = 60s       # in milliseconds; 0 disables
max_replication_slots = 4 # max number of replication slots (change requires restart)You can run the command below to start Postgres with the password provided, attach Postgres to the host port 5432, and also mount the configuration file that was just created to be used as the default configuration file in the container:
$ docker run -d --name cdc-postgres -p 5432:5432 \
-v "$PWD/pgconfig.conf":/usr/share/postgresql/postgresql.conf.sample \
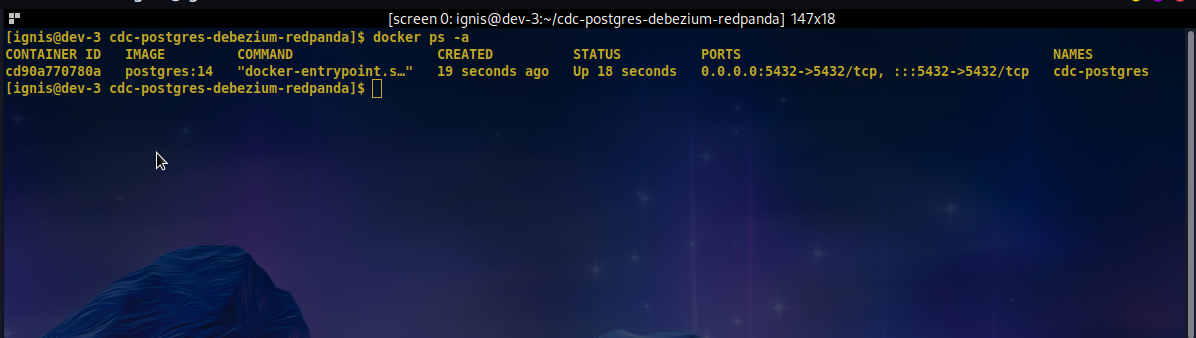
-e POSTGRES_PASSWORD=mysecretpassword postgres:14You can check that the container started successfully by running the docker ps command as seen in the image below.
You now need to log in into Postgres, create a database, and inside that database, create a table and add some records.
You can grab this SQL file prepared for this tutorial; it creates a database called shop, and a table within that database called customer_addresses. It also imports some records into the customer_addresses table.
Run and import the script as below:
$ cat "$PWD/data_import.sql" | docker exec -it cdc-postgres psql -U postgres
Now that your database and data are ready, you need to set up Debezium with Kafka Connect to read changes from the Postgres database to the Redpanda cluster.
First, you need to create the Dockerfile in your current directory and paste the following into it:
FROM confluentinc/cp-kafka-connect-base:7.2.0

RUN confluent-hub install --no-prompt debezium/debezium-connector-postgresql:1.9.3
This uses the Kafka Connect Docker image as a base and then installs the Debezium plug-in on it.
The result of running the command below would be a Kafka Connect image with the Debezium plug-in installed:
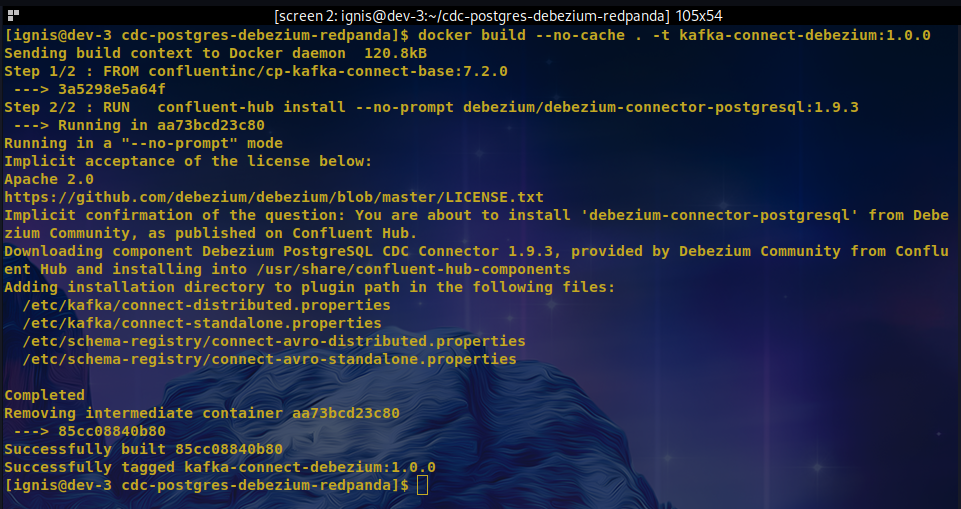
$ docker build --no-cache . -t kafka-connect-debezium:1.0.0
You should have a similar output as below.
With the image created, you can now start a Connect container attached to and listening on port 8083 of the host machine:
$ docker run -it --name cdc-connect --net=host -p 8083:8083 \
-e CONNECT_BOOTSTRAP_SERVERS=localhost:9092 \
-e CONNECT_REST_PORT=8082 \
-e CONNECT_GROUP_ID="1" \
-e CONNECT_CONFIG_STORAGE_TOPIC="shop-config" \
-e CONNECT_OFFSET_STORAGE_TOPIC="shop-offsets" \
-e CONNECT_STATUS_STORAGE_TOPIC="shop-status" \
-e CONNECT_KEY_CONVERTER="org.apache.kafka.connect.json.JsonConverter" \
-e CONNECT_VALUE_CONVERTER="org.apache.kafka.connect.json.JsonConverter" \
-e CONNECT_INTERNAL_KEY_CONVERTER="org.apache.kafka.connect.json.JsonConverter" \
-e CONNECT_INTERNAL_VALUE_CONVERTER="org.apache.kafka.connect.json.JsonConverter" \
-e CONNECT_REST_ADVERTISED_HOST_NAME="cdc-connect" \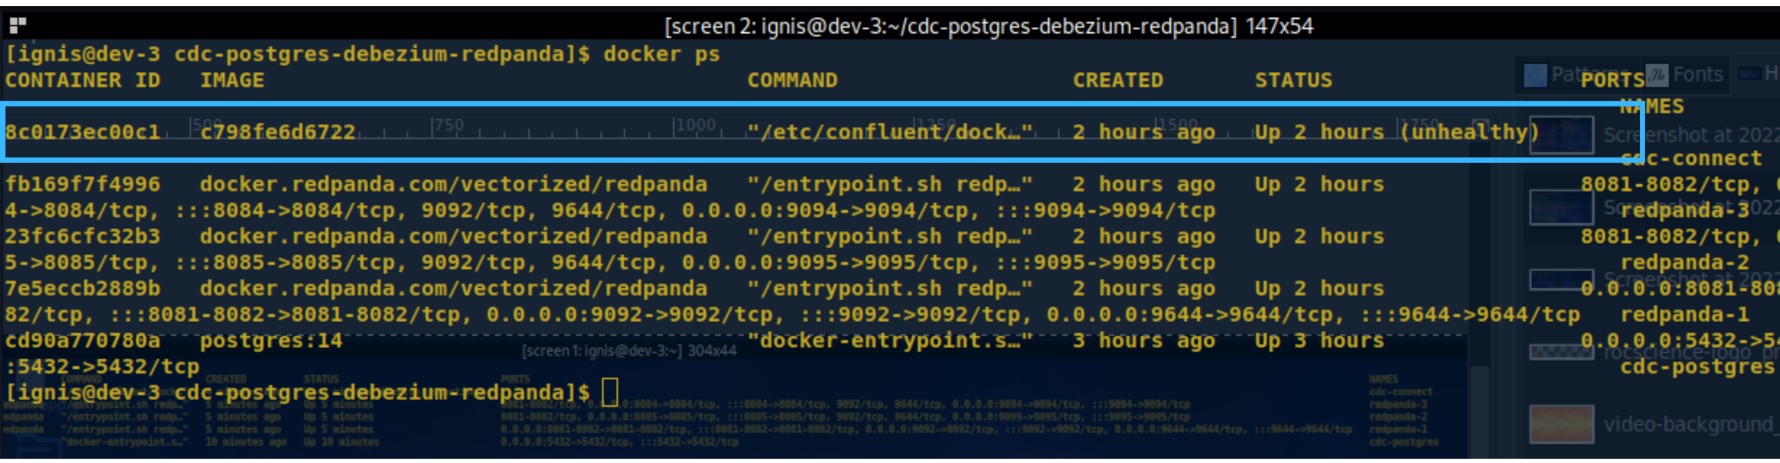
kafka-connect-debezium:1.0.0Using the docker ps command, you can check to see if the Connect container is running successfully as expected like below.
The various Connect options used in this command, among others, are documented here: https://docs.confluent.io/platform/current/installation/docker/config-reference.html#kconnect-long-configuration.
Check the available plug-ins to verify if Debezium for Postgres has been installed as expected:
$ curl -sS localhost:8083/connector-plugins

## Output

[{"class":"io.debezium.connector.postgresql.PostgresConnector","type":"source","version":"1.9.3.Final"},{"class":"org.apache.kafka.connect.mirror.MirrorCheckpointConnector","type":"source","version":"7.2.0-ccs"},{"class":"org.apache.kafka.connect.mirror.MirrorHeartbeatConnector","type":"source","version":"7.2.0-ccs"},{"class":"org.apache.kafka.connect.mirror.MirrorSourceConnector","type":"source","version":"7.2.0-ccs"}]Create a file named register-connector.json and paste the snippet below into it. This file will be used to configure Debezium. It defines the various database options by which Debezium will connect to the running Postgres instance:
{
   "name":"shop-connector",
   "config":{
      "connector.class":"io.debezium.connector.postgresql.PostgresConnector",
      "database.hostname":"localhost",
      "plugin.name":"pgoutput",
      "tasks.max": "1",
      "database.port":"5432",
      "database.user":"postgres",
      "database.password":"mysecretpassword",
      "database.dbname":"shop",
      "schema.include.list":"public",
      "database.server.name":"shop-server"
   }
}
All configuration options used and available can be found explained in the Kafka Connect documentation here (https://docs.confluent.io/debezium-connect-postgres-source/current/postgres/_source/_connector/_config.html#postgresql-source-connector-debezium-configuration-properties) and further in Debezium's documentation here.
Register the connector with the configuration file created by making an HTTP request to the Connect's Restful API as seen with the command and output below:
$ curl -i -X POST -H "Accept:application/json" -H  "Content-Type:application/json" http://localhost:8083/connectors/ -d @register-connector.json

###Output
HTTP/1.1 201 Created
Date: Mon, 18 Jul 2022 13:08:15 GMT
Location: http://localhost:8083/connectconnector
Content-Type: application/json
Content-Length: 422
Server: Jetty(9.4.44.v20210927)

{"name":"shop-connector","config":{"connector.class":"io.debezium.connector.postgresql.PostgresConnector","database.hostname":"localhost","plugin.name":"pgoutput","tasks.max":"1","database.port":"5432","database.user":"postgres","database.password":"mysecretpassword","database.dbname":"shop","database.server.name":"shop-server1","table.whitelist":"customer_addresses","name":"shop-connector"},"tasks":[],"type":"source"}
Check Connector Presence by making another HTTP request to Connect's Restful API:
$ curl -H "Accept:application/json" localhost:8083/connectors/

###Output
["shop-connector"]Once Debezium is running, you should expect it to create some topics on the Redpanda cluster. You can list the topics created by executing the following command on the main node of the RedPanda cluster:
If your Redpanda cluster is running on Docker, you need to first enter the shell of the main node before running the command above. This can be done as seen below. Make sure to replace redpanda-1 with the actual container name:
$ rpk cluster info$ docker exec -it redpanda-1 /bin/bashYou should see an output similar to this:
NAME                                   PARTITIONS  REPLICAS
shop-config                            1           3
shop-offsets                           25          3
shop-server.public.customer_addresses  1           1
shop-status
Notice the topic with the name shop-server.public.customer_addresses, which follows the format {database.server.name}.{schema}.{table_name}. That's the topic to be consumed in order to receive the data changes streamed from the Postgres customer\_addresses data table.
You can do that by executing the following command on the lead or main node of the Redpanda cluster:
Running this command will flash a whole lot of JSON items on your screen. It continuously streams any changes made in the database to the standard output. You can try this by using a different terminal to update a record in the Postgres database container, but before that, understand the data being received.
Each item represents data feed on changes that occurred at a specific time in the respective table and looks like as follows:
{
   "topic":"shop-server.public.customer_addresses",
   "key":"{\"schema\":{\"type\":\"struct\",\"fields\":[{\"type\":\"int32\",\"optional\":false,\"default\":0,\"field\":\"id\"}],\"optional\":false,\"name\":\"shop_server.public.customer_addresses.Key\"},\"payload\":{\"id\":185}}",
   "value":"{\"schema\":{\"type\":\"struct\",\"fields\":[{\"type\":\"struct\",\"fields\":[{\"type\":\"int32\",\"optional\":false,\"default\":0,\"field\":\"id\"},{\"type\":\"string\",\"optional\":true,\"field\":\"first_name\"},{\"type\":\"string\",\"optional\":true,\"field\":\"last_name\"},{\"type\":\"string\",\"optional\":true,\"field\":\"email\"},{\"type\":\"string\",\"optional\":true,\"field\":\"res_address\"},{\"type\":\"string\",\"optional\":true,\"field\":\"work_address\"},{\"type\":\"string\",\"optional\":true,\"field\":\"country\"},{\"type\":\"string\",\"optional\":true,\"field\":\"state\"},{\"type\":\"string\",\"optional\":true,\"field\":\"phone_1\"},{\"type\":\"string\",\"optional\":true,\"field\":\"phone_2\"}],\"optional\":true,\"name\":\"shop_server.public.customer_addresses.Value\",\"field\":\"before\"},{\"type\":\"struct\",\"fields\":[{\"type\":\"int32\",\"optional\":false,\"default\":0,\"field\":\"id\"},{\"type\":\"string\",\"optional\":true,\"field\":\"first_name\"},{\"type\":\"string\",\"optional\":true,\"field\":\"last_name\"},{\"type\":\"string\",\"optional\":true,\"field\":\"email\"},{\"type\":\"string\",\"optional\":true,\"field\":\"res_address\"},{\"type\":\"string\",\"optional\":true,\"field\":\"work_address\"},{\"type\":\"string\",\"optional\":true,\"field\":\"country\"},{\"type\":\"string\",\"optional\":true,\"field\":\"state\"},{\"type\":\"string\",\"optional\":true,\"field\":\"phone_1\"},{\"type\":\"string\",\"optional\":true,\"field\":\"phone_2\"}],\"optional\":true,\"name\":\"shop_server.public.customer_addresses.Value\",\"field\":\"after\"},{\"type\":\"struct\",\"fields\":[{\"type\":\"string\",\"optional\":false,\"field\":\"version\"},{\"type\":\"string\",\"optional\":false,\"field\":\"connector\"},{\"type\":\"string\",\"optional\":false,\"field\":\"name\"},{\"type\":\"int64\",\"optional\":false,\"field\":\"ts_ms\"},{\"type\":\"string\",\"optional\":true,\"name\":\"io.debezium.data.Enum\",\"version\":1,\"parameters\":{\"allowed\":\"true,last,false,incremental\"},\"default\":\"false\",\"field\":\"snapshot\"},{\"type\":\"string\",\"optional\":false,\"field\":\"db\"},{\"type\":\"string\",\"optional\":true,\"field\":\"sequence\"},{\"type\":\"string\",\"optional\":false,\"field\":\"schema\"},{\"type\":\"string\",\"optional\":false,\"field\":\"table\"},{\"type\":\"int64\",\"optional\":true,\"field\":\"txId\"},{\"type\":\"int64\",\"optional\":true,\"field\":\"lsn\"},{\"type\":\"int64\",\"optional\":true,\"field\":\"xmin\"}],\"optional\":false,\"name\":\"io.debezium.connector.postgresql.Source\",\"field\":\"source\"},{\"type\":\"string\",\"optional\":false,\"field\":\"op\"},{\"type\":\"int64\",\"optional\":true,\"field\":\"ts_ms\"},{\"type\":\"struct\",\"fields\":[{\"type\":\"string\",\"optional\":false,\"field\":\"id\"},{\"type\":\"int64\",\"optional\":false,\"field\":\"total_order\"},{\"type\":\"int64\",\"optional\":false,\"field\":\"data_collection_order\"}],\"optional\":true,\"field\":\"transaction\"}],\"optional\":false,\"name\":\"shop_server.public.customer_addresses.Envelope\"},\"payload\":{\"before\":null,\"after\":{\"id\":185,\"first_name\":\"Vittoria\",\"last_name\":\"Pischoff\",\"email\":\"vpischoff54@networkadvertising.org\",\"res_address\":\"5163 Fair Oaks Court\",\"work_address\":\"85 Summer Ridge Lane\",\"country\":\"South Africa\",\"state\":\"SA Citry\",\"phone_1\":\"731-321-3226\",\"phone_2\":\"406-415-1911\"},\"source\":{\"version\":\"1.9.3.Final\",\"connector\":\"postgresql\",\"name\":\"shop-server\",\"ts_ms\":1658166599242,\"snapshot\":\"false\",\"db\":\"shop\",\"sequence\":\"[\\\"27167248\\\",\\\"27177240\\\"]\",\"schema\":\"public\",\"table\":\"customer_addresses\",\"txId\":976,\"lsn\":27177240,\"xmin\":null},\"op\":\"u\",\"ts_ms\":1658166599439,\"transaction\":null}}",
   "timestamp":1658166599494,
   "partition":0,
   "offset":251
}
Redpanda adds some metadata to each received data item:
An in-depth explanation of the values from Debezium under the key and value keys can be read here.
Since you are now able to consume data from the Redpanda topic for the customer\_addresses table using the rpk command as seen above, you can now test streaming data changes from Postgres in real time.
To do this, you will need two terminals open. In the first terminal, you will execute the rpk topic consume command as seen in the previous section and keep it running. Note the last record's offset number and timestamp value on this screen.
In the second terminal, you will connect to the Postgres database to execute an update statement to one of the records in the customer\_addresses table. You can do that by running the commands below.
Connect to the Postgres database using the psql program in the Postgres container:
$ docker exec -it cdc-postgres psql -U postgres shop
Your terminal cursor should now look like below.
psql (14.4 (Debian 14.4-1.pgdg110+1))
Type "help" for help.

shop=# Paste and execute this update statement to update the state field of the record with id 10:
update public.customer_addresses set state = 'Johannesburg' where id = 10;
Immediately, you should see the new change record stream in on the "consuming" terminal as seen below:

You will notice a different offset number and timestamp value. This shows you that you can now stream database record changes in real time. You can go ahead and update multiple records to see and examine the output.
Since this tutorial was first published, Redpanda Connect has expanded its native CDC support beyond the original Postgres, MySQL, and MongoDB inputs. You can now stream changes from:
Redpanda Connect is a separate product from Kafka Connect. It requires no JVM or Kafka Connect runtime, deploys as a single binary configured via YAML, and offers 300+ connectors optimized to run in containers. Compared to the Debezium connector list, which requires the JVM-based Kafka Connect runtime, Redpanda Connect offers a favorable mix of CDC support with a simpler operational footprint.
If you're starting a new CDC project or looking to simplify your existing Debezium-based pipeline, Redpanda Connect is worth evaluating. See the Redpanda Connect Components Catalog for the full list of supported inputs and outputs.
Subscribe to our VIP (very important panda) mailing list to pounce on the latest blogs, surprise announcements, and community events!
Opt out anytime.