
Flag non-compliant content in real time with AI and Pinecone
Learn how to pinpoint harmful comments streamed in real time using Redpanda Connect and a popular vector database

If you’re familiar with emerging technologies in the AI space, you’ve likely heard of Pinecone, a serverless vector database provider. Pinecone is a vector database that allows engineers to store their vectorized data and inject that data into large language model (LLM) calls. This enables AI applications to use data outside what is contained in their original training data when generating responses.
Pinecone becomes even more powerful if you keep it updated with new information, either by ingesting a running feed or updating the data set in response to events. Enter Redpanda Connect, a simpler alternative to Kafka Connect with over 290 connectors to popular data sources. In this scenario, we’ll use Redpanda Connect to easily bring all your streaming data into Pinecone.
Combining Pinecone and Redpanda can unlock many different use cases:
- Real-time recommendation systems: You can use pre-indexed user behavior and preferences stored in Pinecone to perform fast similarity searches and deliver personalized recommendations.
- Fraud detection: You can stream raw transactional data into Redpanda, upload it into Pinecone's vector database, and perform rapid similarity comparisons of transactional data to identify fraudulent activity.
- Dynamic user profiling for personalized marketing: You can query pre-generated and pre-indexed user profiles stored in Pinecone to find similar users and deliver targeted marketing campaigns.
- Real-time news article clustering and similarity search: You can search and cluster pre-indexed news articles in Pinecone based on topic similarity, allowing for fast retrieval of relevant articles from existing data.
In this tutorial, you’ll build an application that combines Redpanda and Pinecone to screen streamed content and uses AI to flag something that needs a human reviewer.
Tutorial: flag content with AI, Redpanda, and Pinecone
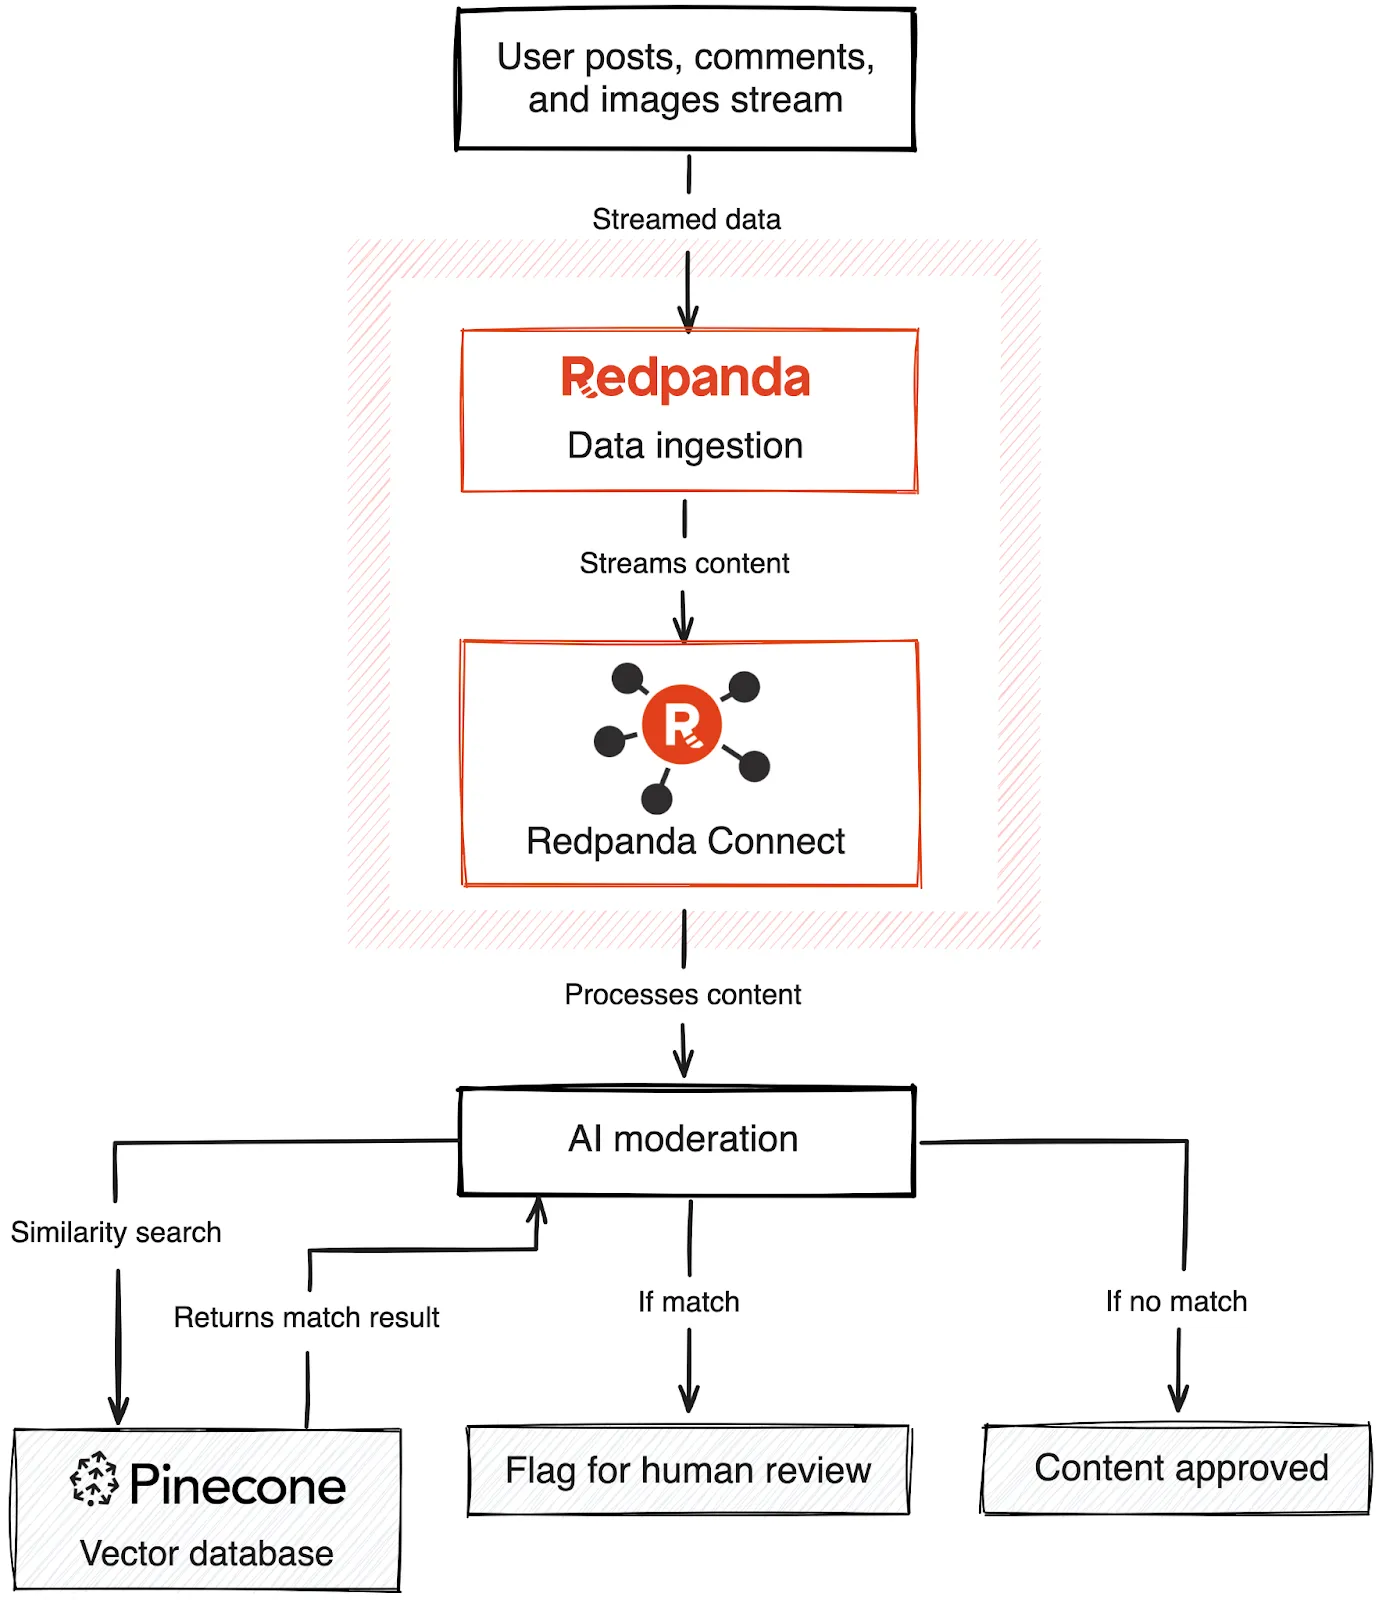
Imagine you’re running a social media platform that needs to look at a stream of users’ comments, posts, and images and decide in near-real time whether they violate any of your content policies. Redpanda’s streaming data platform will handle the incoming stream of content, but you need an efficient and scalable way to decide whether content violates your policy.
This is where technology like Pinecone comes in. By populating a vector database with a known set of compliant or non-compliant content, you can perform a similarity search to decide whether new content streamed from Redpanda needs to be flagged for human reviewers. This way, you can let AI do the first pass of moderation work for you while ensuring that nothing harmful to your platform slips through the cracks.
First, let’s take a look at how this would be set up:
Prerequisites
Before you start building, you’ll need the following:
- A Redpanda account. You’ll use Redpanda to connect your incoming data stream to Pinecone. For ease, we’ll use Redpanda Serverless for this tutorial.
- A Pinecone account, as all the data will eventually live in Pinecone.
- Some basic familiarity with Git, as well as GitHub access and the Git client installed on your machine.
As always, you can skip ahead and find all the code in this GitHub repo.
Step 1. Create a Redpanda cluster and topic
To get started, log in to your Redpanda account. You’ll be prompted to create a cluster, so select Create Serverless cluster, which you’ll need for this tutorial.

You’ll see a few different settings options. You can leave most of the default settings for this tutorial as is. However, if you have any specific infrastructure requirements for your organization, you should update them now.

Once you click Create, you’ll see that your cluster is set up.
In Redpanda, a topic is a named channel or feed to which data can be published. It’s essentially a log of messages, where each message is a key-value pair. Topics are used to organize and categorize data streams, allowing multiple producers to write data and multiple consumers to read data simultaneously.
Click Topics in the left-hand menu, then click Create topic to configure a topic.
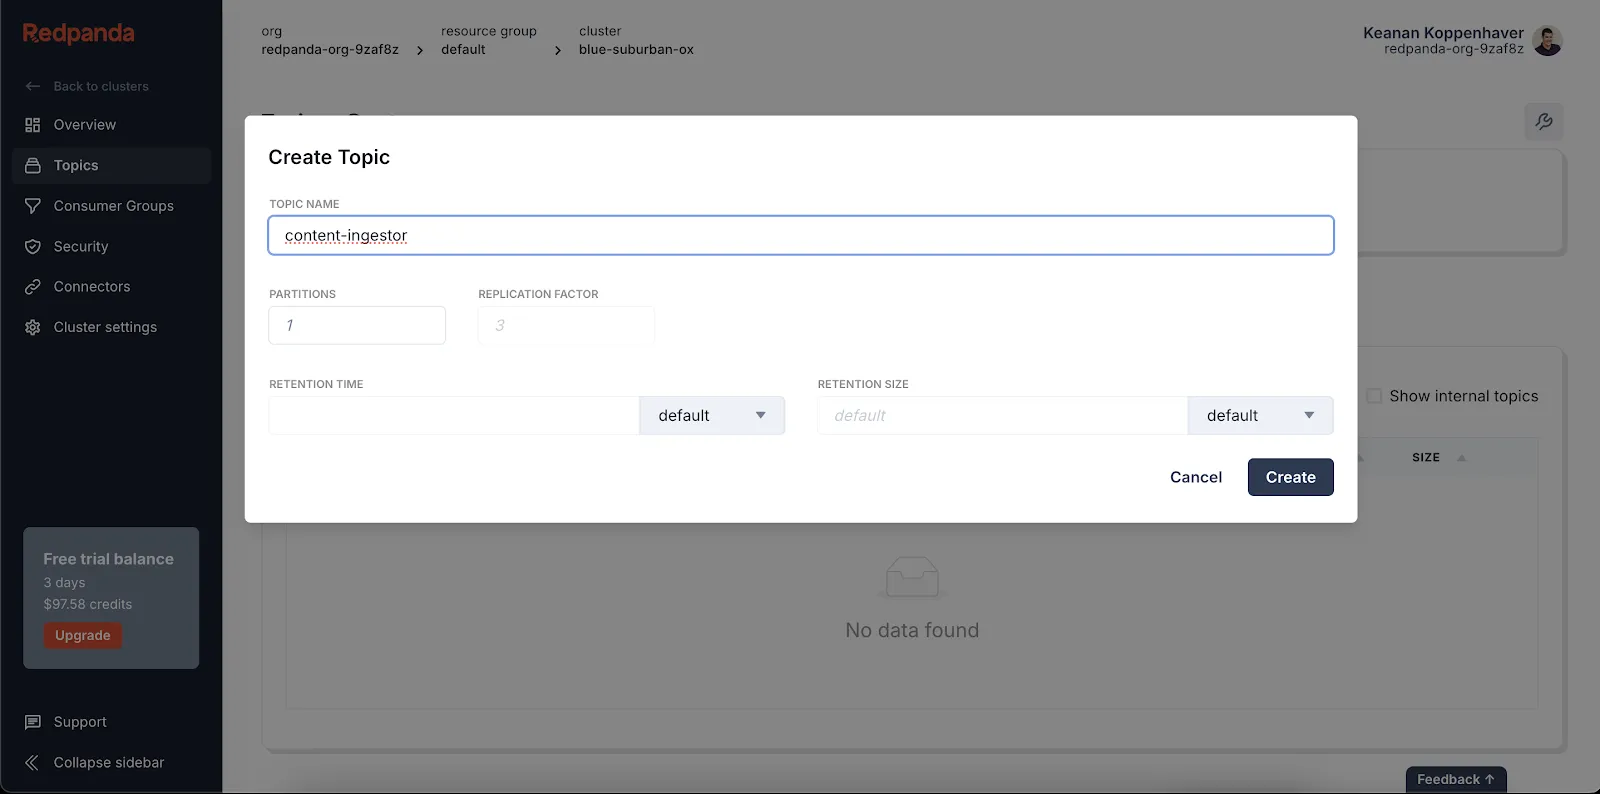
Create a new topic called content-ingestor. Once that’s done, you’re ready to set up Pinecone.
Step 2. Log in to Pinecone and prepare an index
Getting Redpanda set up to accept data is one thing, but you still need a place to store it. In this section, you’ll configure a Pinecone index to store your vectorized and tagged social media content. Your sample content will either be compliant or non-compliant with your content policies, and you’ll reference it when deciding if new content should be allowed.
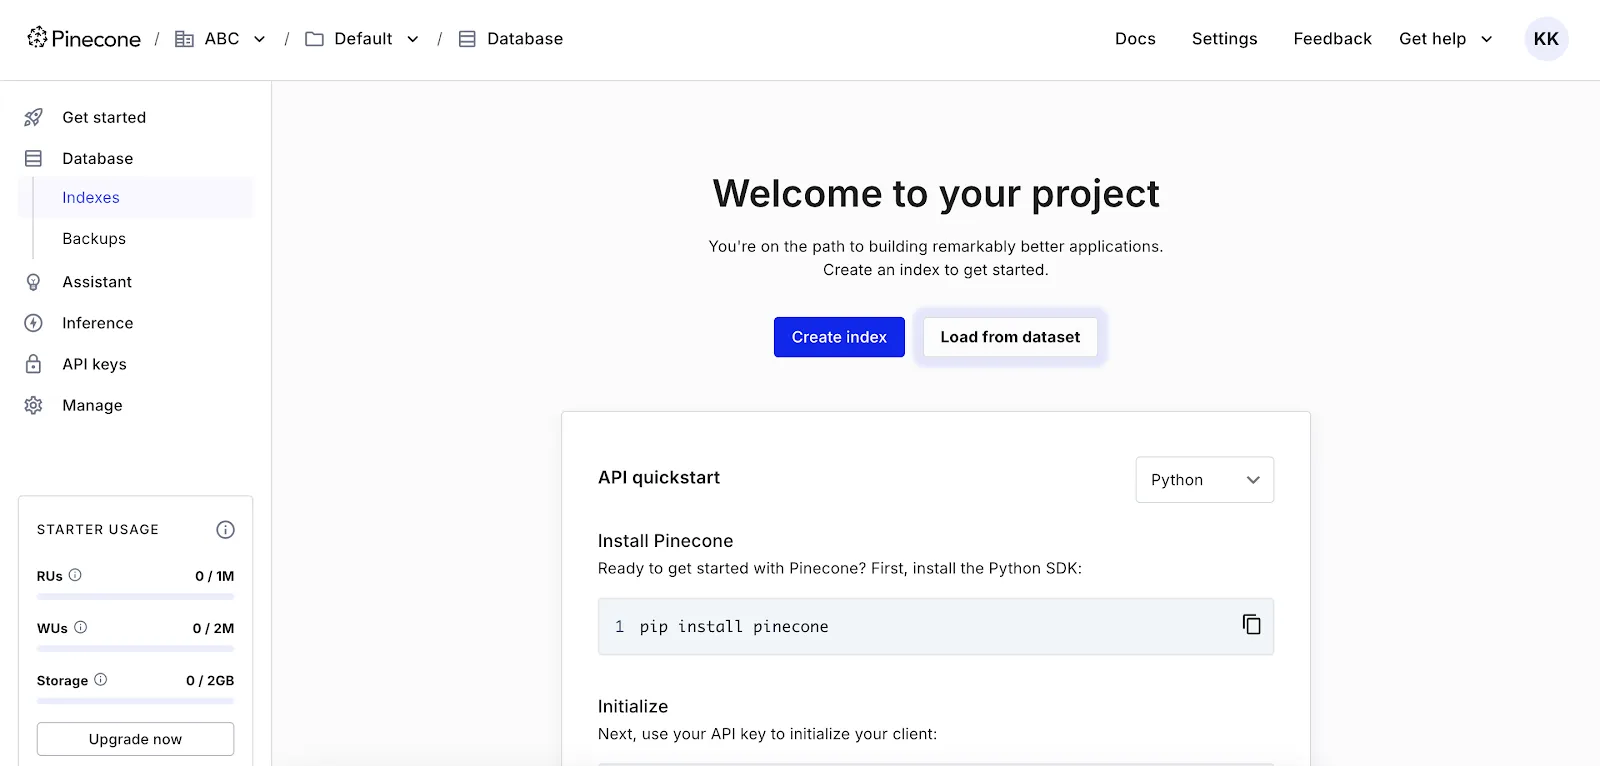
Log in to your Pinecone account, click Indexes in the left-hand navigation pane, and then click Create index.
You’ll be prompted to configure a couple of settings. An important note is that you should configure your index to use 384 dimensions and the cosine metric to match the vectors that your sample application will be generating. This is crucial because you need the vector index to match the number of dimensions that the embedding model will generate from the input text.
If you’re using a different embedding model, you can also have Pinecone generate these values for you automatically by clicking Setup by model.
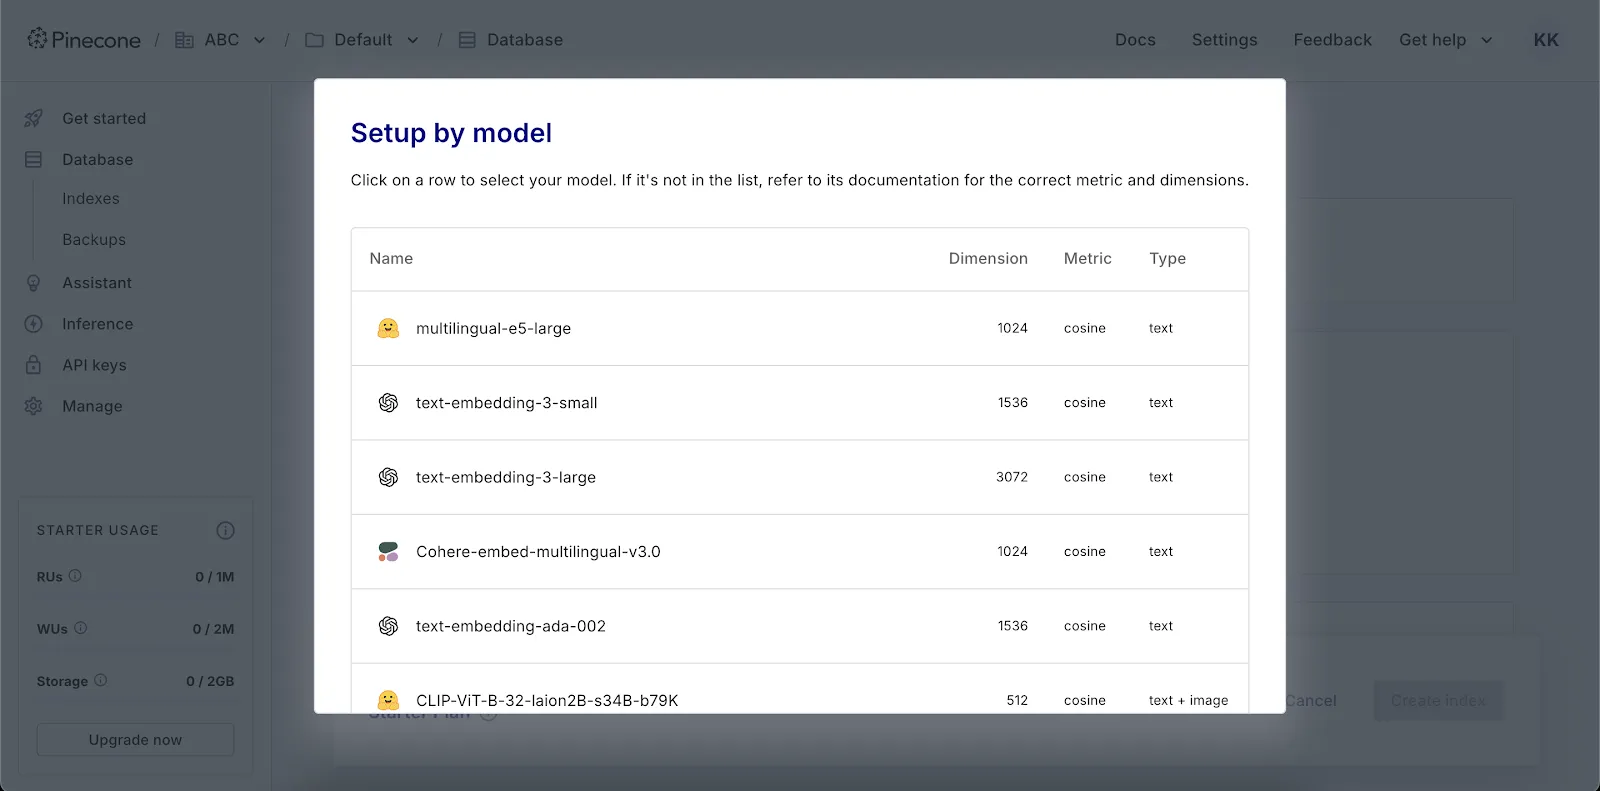
Click Create index.
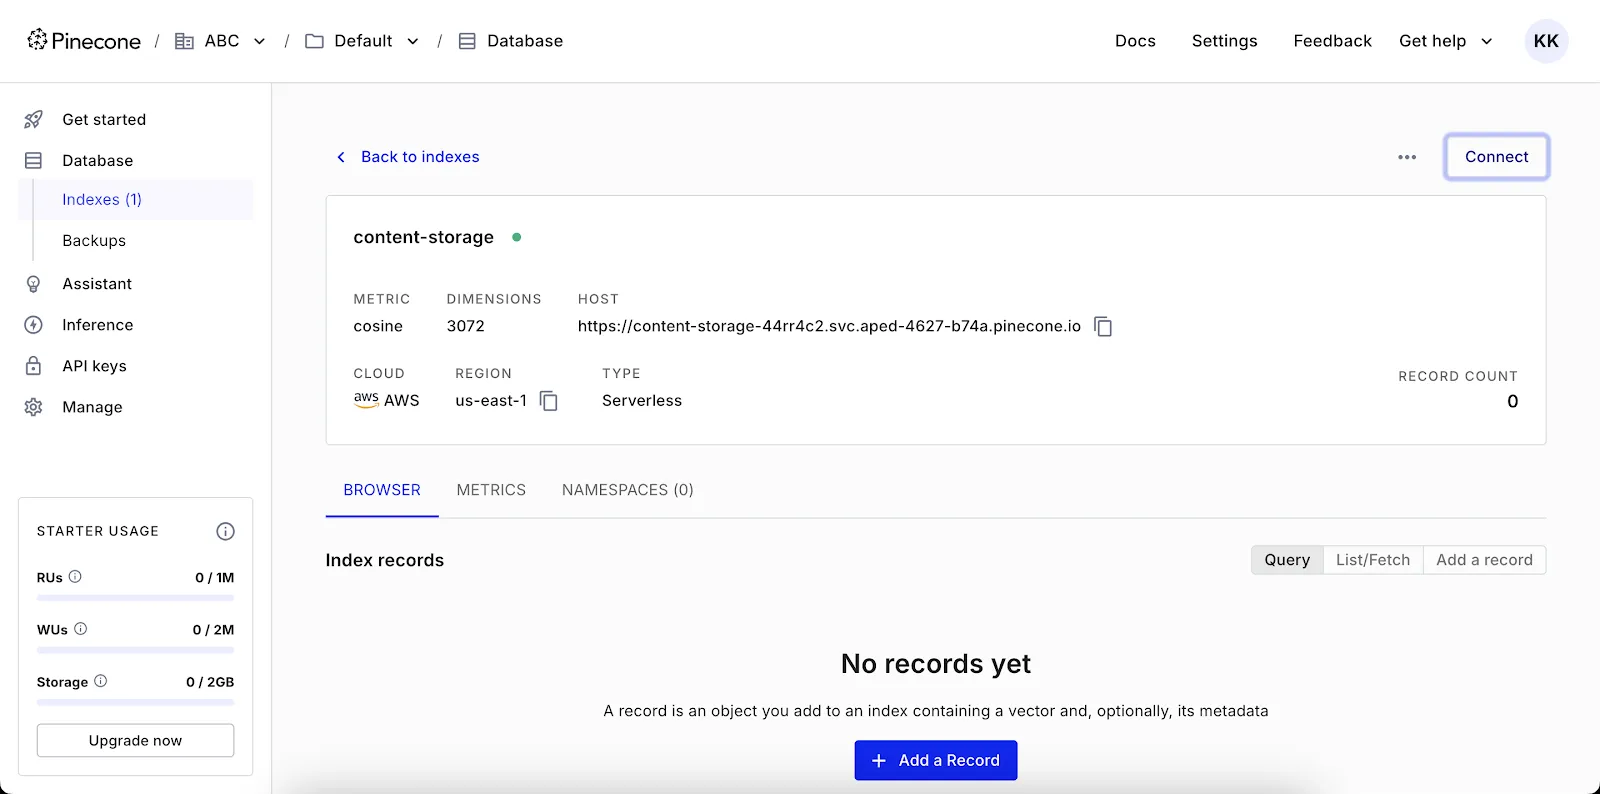
You can now link your configured Redpanda account to your configured Pinecone account using Redpanda Connect.
Step 3. Install Redpanda Connect and configure the connector
Set up Redpanda Connect right from the Redpanda dashboard. Start by clicking the Connectors menu item, which will take you to the Redpanda Connect Pipelines screen.
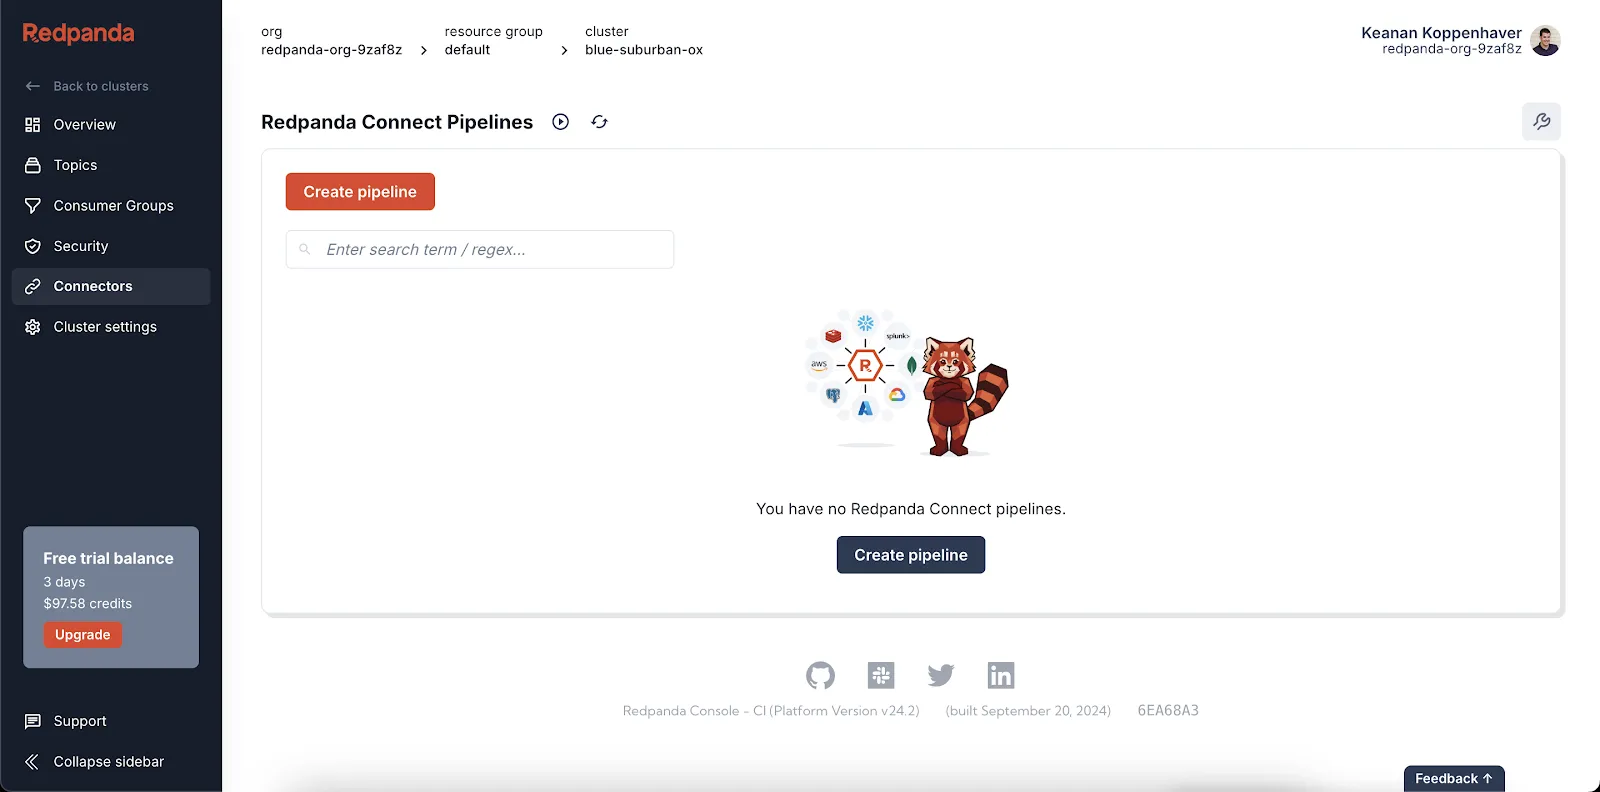
You can add a pipeline name like “Social Media Monitor.” You’re now ready to configure your new pipeline.
Redpanda Connect uses a YAML file to specify the source of data and its destination. In this example, you want to source data from the previously created content-ingestor topic and set up your Pinecone index as the destination.
The input section
Use the input section to point Redpanda Connect to your Redpanda topic. Later in this tutorial, you’ll populate this topic with data, but for now, just tell Redpanda Connect this is where data will be coming from:
input:
  kafka_franz:
    seed_brokers:
      - <your_kafka_url>
    sasl:
      - mechanism: SCRAM-SHA-256
        password: <your_user_password>
        username: <your_username>
    topics: ["content-ingestor"]
    consumer_group: ""
    tls:
      enabled: true
Swap out the <your_kafka_url> placeholder for the actual address of your Kafka server. You can find this by clicking Overview in the left-hand navigation of the Redpanda dashboard and then looking for the Bootstrap server URL under the Kafka API tab.
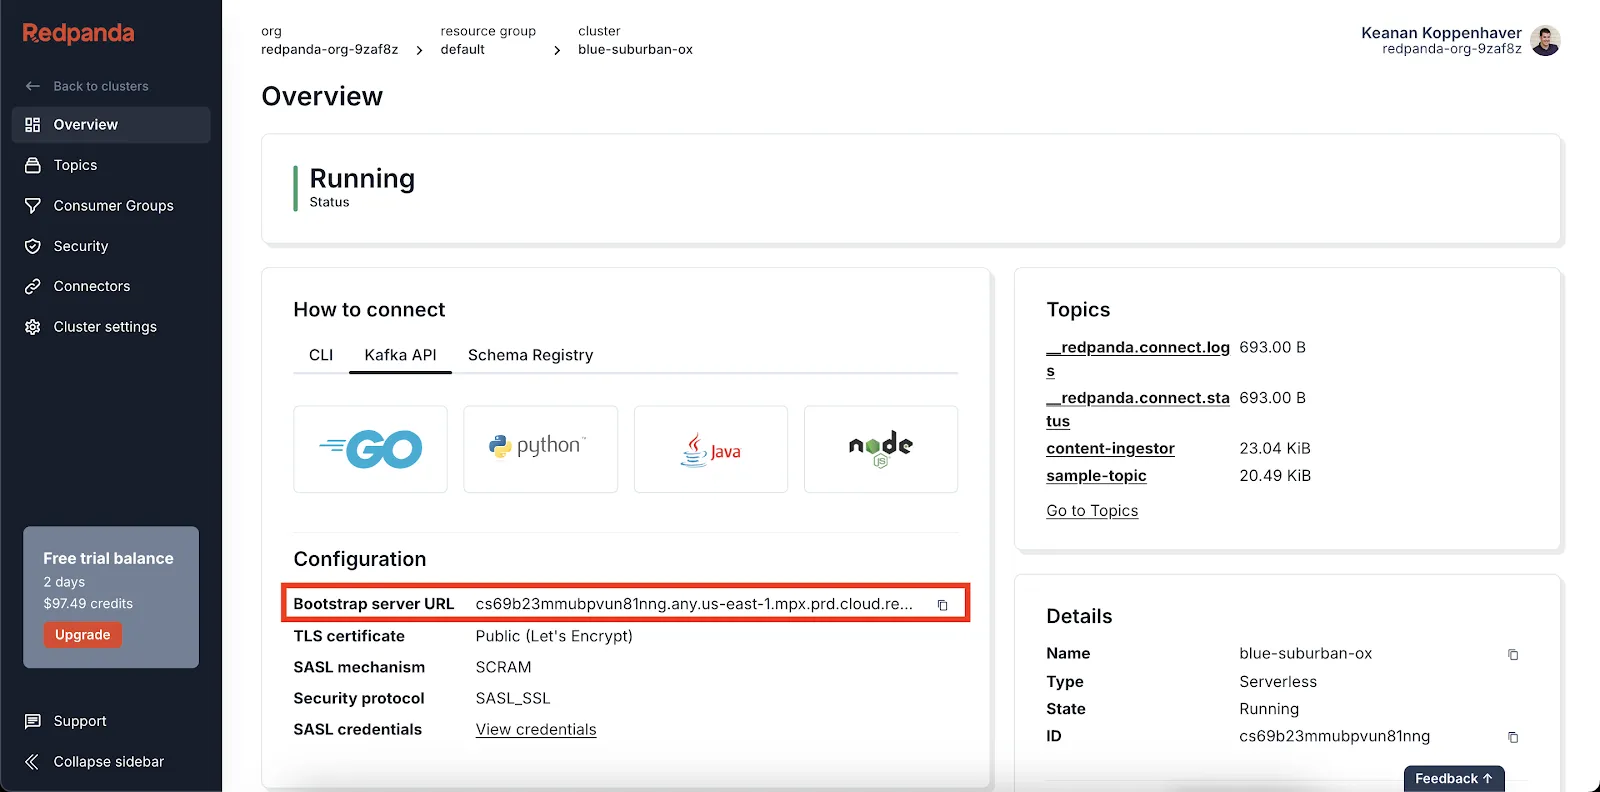
Next, create a username and password. Click the Security menu in the left-hand navigation of the Redpanda dashboard, then click Create user and fill in the necessary credentials. Make sure to copy down the password you create, as you won’t be able to see it again.
Then, click Create ACL to create an access control list (ACL) that gives your newly created user all available permissions.
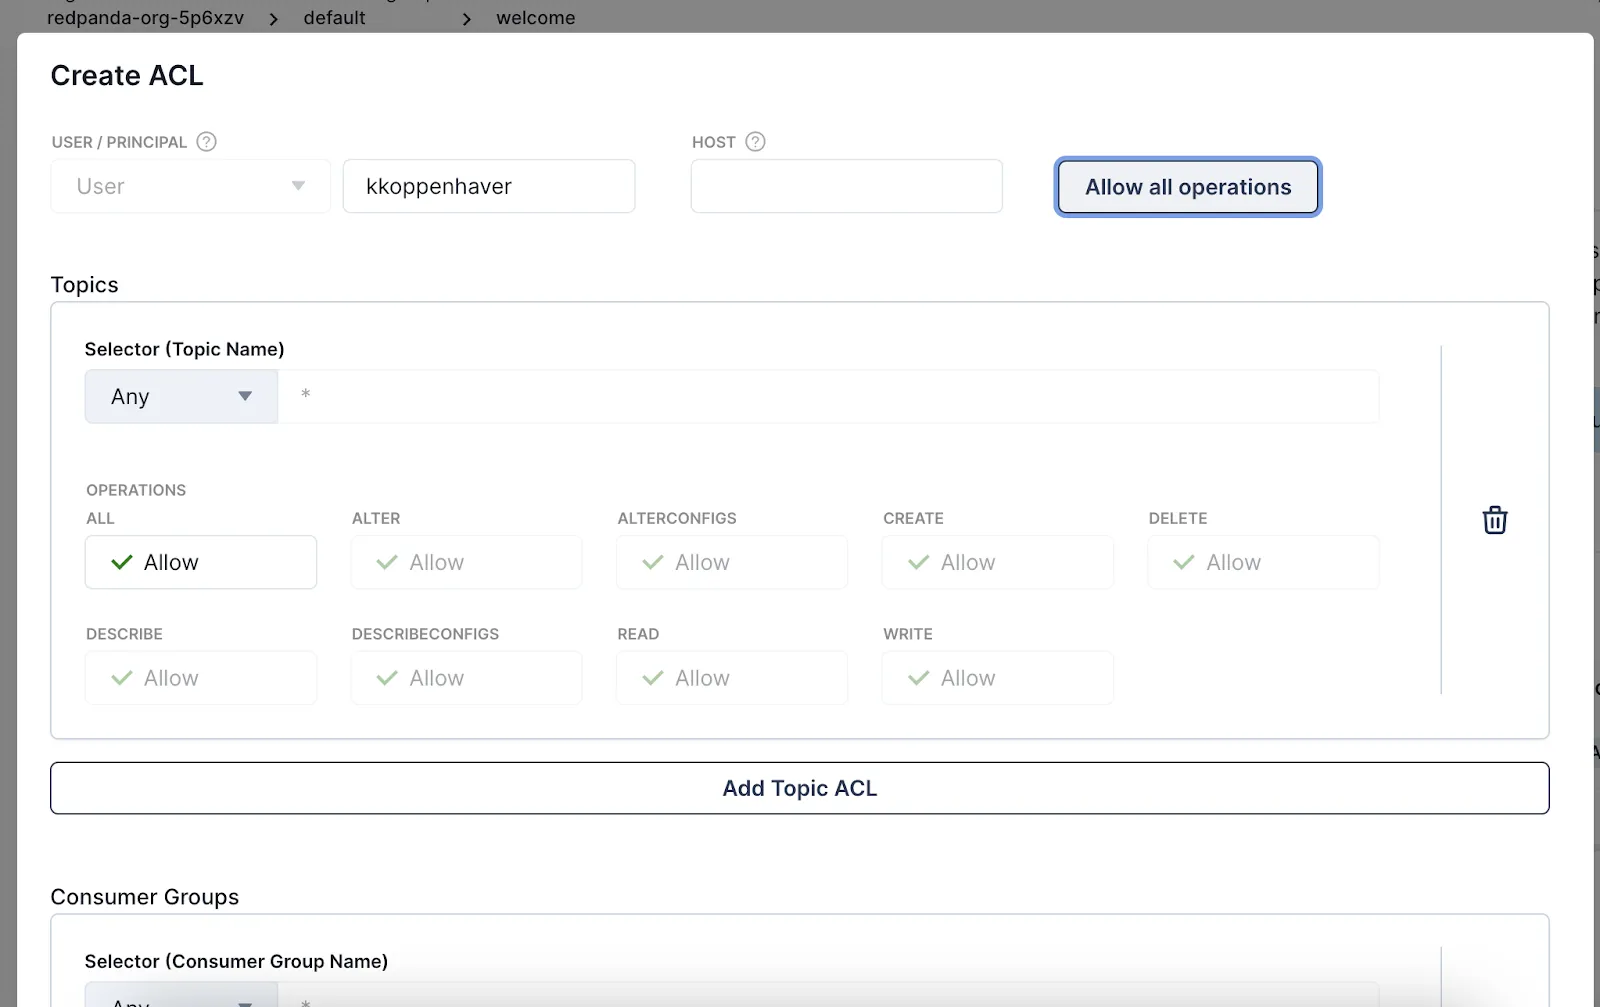
Finally, copy and paste your generated username and password into the YAML config file above so that Redpanda Connect can use your new credentials to pull information from your Kafka topic.
The output section
Next, pass your processed data to Pinecone so it can be stored in your recently created index. This is what that piece of the config looks like:
output:
  pinecone:
    host: "<your_pinecone_host_url>"
    api_key: "<your_pinecone_api_key>"
    id: '${! timestamp_unix() }'
    vector_mapping: this.embeddings
    metadata_mapping: |
      root.is_harmful = this.is_harmful
You’ll need to swap out the placeholders for your particular host URL and API key, which can be found in your Pinecone dashboard. When you paste in your Pinecone host URL, make sure to exclude the https:// prefix.
Putting it all together
With both of these pieces in place, your final config file should look like this:
input:
  kafka_franz:
    seed_brokers:
      - <your_kafka_url>
    sasl:
      - mechanism: SCRAM-SHA-256
        password: <your_user_password>
        username: <your_username>
    topics: ["content-ingestor"]
    consumer_group: ""
    tls:
      enabled: true

output:
  pinecone:
    host: "<your_pinecone_host_url>"
    api_key: "<your_pinecone_api_key>"
    id: '${! timestamp_unix() }'
    vector_mapping: this.embeddings
    metadata_mapping: |
      root.is_harmful = this.is_harmful
If you click the Create button below your configuration, you’ll see your pipeline labeled “Starting”, which should soon change to “Running”. With that, your pipeline is up and running!
Step 4. Create a producer script to fill your topic with data
For all this configuration to be useful, you need to actually produce some data into your topic. Here’s where we introduce you to the producer.py script from the GitHub codebase, which does a few things:
- Connects to your Redpanda topic
- Loops through a list of sample comments, turning each one into embeddings that can be stored in Pinecone
- Pushes these comments into your Redpanda topic
Let’s briefly examine the code itself, then look at how to set it up on your machine:
import sys
import json
from sentence_transformers import SentenceTransformer

from dotenv import load_dotenv
import os

load_dotenv()

# Workaround for Python 3.12+ compatibility with kafka-python library
if sys.version_info >= (3, 12, 0):
    import six
    sys.modules['kafka.vendor.six.moves'] = six.moves

import socket
from kafka import KafkaProducer
from kafka.errors import KafkaError

# Initialize Kafka producer with connection details
producer = KafkaProducer(
    bootstrap_servers=os.getenv('KAFKA_URL'),
    security_protocol="SASL_SSL",
    sasl_mechanism="SCRAM-SHA-256",
    sasl_plain_username=os.getenv('KAFKA_USERNAME'),
    sasl_plain_password=os.getenv('KAFKA_PASSWORD'),
)

# Get the hostname to use as the message key
hostname = str.encode(socket.gethostname())

# Callback function for successful message sending
def on_success(metadata):
    print(f"Sent to topic '{metadata.topic}' at offset {metadata.offset}")

# Callback function for error handling
def on_error(e):
    print(f"Error sending message: {e}")

# Sample data set of comments with their IDs and harmfulness labels
comments_with_labels = [
    (1, "This is a friendly comment", False),
    (2, "You're an idiot", True),
    (3, "Great post, thanks for sharing!", False),
    (4, "I hope you die", True),
    (5, "Your analysis is spot on, I learned a lot", False),
    (6, "This article is garbage", True),
    (7, "I respectfully disagree with your point", False),
    (8, "Go back to where you came from", True),
    (9, "Can you provide more details on this topic?", False),
    (10, "You should be ashamed of yourself", True),
    (11, "I appreciate your perspective on this issue", False),
    (12, "This is fake news, you're a liar", True),
    (13, "Your work has really inspired me", False),
    (14, "I'm going to report you to the authorities", True),
    (15, "Let's agree to disagree on this one", False),
    (16, "You're nothing but a fraud", True),
    (17, "This content is really helpful, thank you", False),
    (18, "I wish you would just disappear", True),
    (19, "I hadn't considered that angle before, interesting", False),
    (20, "You're brainwashed by the media", True),
    (21, "Could you clarify your third point?", False),
    (22, "Stop spreading your propaganda", True),
    (23, "I'm looking forward to your next post", False),
    (24, "You're a disgrace to your profession", True),
    (25, "This discussion has been very enlightening", False),
    (26, "I hope your account gets banned", True),
    (27, "Your research seems very thorough", False),
    (28, "You're just pushing your own agenda", True),
    (29, "I found your arguments very compelling", False),
    (30, "Nobody cares about your opinion", True),
    (31, "This is a complex issue, thanks for breaking it down", False),
    (32, "You're part of the problem in society", True),
    (33, "I'm sharing this with my colleagues", False),
    (34, "Do the world a favor and stop posting", True),
    (35, "Your insights have changed my perspective", False),
    (36, "You're clearly not qualified to discuss this", True),
    (37, "This is a balanced and fair analysis", False),
    (38, "I'm reporting this post for misinformation", True),
    (39, "You've given me a lot to think about", False),
    (40, "Your stupidity is beyond belief", True)
]

# Process each comment in the data set
for i, (id, comment, is_harmful) in enumerate(comments_with_labels):
    # Initialize the SentenceTransformer model (only once)
    if 'model' not in locals():
        model = SentenceTransformer('sentence-transformers/all-MiniLM-L6-v2')

    # Generate embeddings for the comment
    embeddings = model.encode([comment])[0].tolist()

    # Create a JSON object with comment data
    msg = json.dumps({
        "id": id,
        "embeddings": embeddings,
        "is_harmful": is_harmful
    })

    # Send the message to the Kafka topic
    future = producer.send(
        "content-ingestor",
        key=hostname,
        value=str.encode(msg)  # Encode the JSON string
    )
    # Add callback functions for success and error handling
    future.add_callback(on_success)
    future.add_errback(on_error)

# Ensure all messages are sent before closing the producer
producer.flush()
producer.close()
To run this code, create and activate a Python virtual environment. Once that’s up and running, install all the necessary dependencies inside the activated virtual environment. These are all consolidated in the repo. Plus, you’ll notice that the sensitive information in this script is managed using environment variables. Copy the .env.example file in the repo to .env and fill in your specific Redpanda credentials.
When you’re done, executing the command python producer.py should run the script and push all the sample comments into your Redpanda topic. This will, in turn, trigger your Redpanda Connect pipeline and push all your sample comments into your Pinecone index.
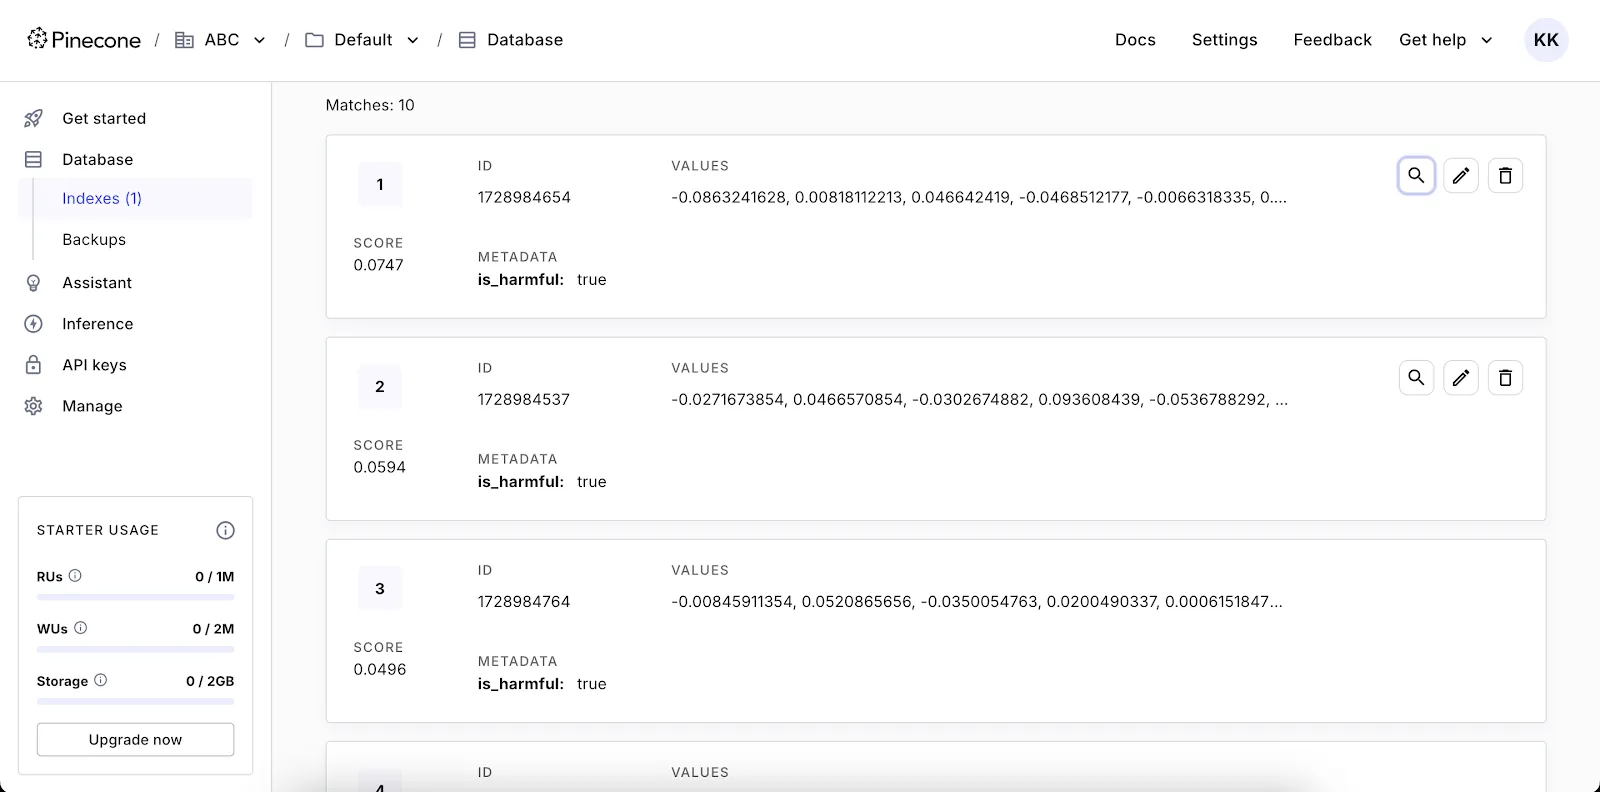
Step 5. Check if a comment is harmful
Now that you have your Pinecone index set up, use the comment_checker.py script in the GitHub repo to check if a comment is harmful. Once you run this script, it’ll prompt you to enter a comment. It’ll then run a similarity search against the comments you inserted into Pinecone earlier, take the most similar comments, decide if most of them are harmful, and then decide whether the comment you typed in was harmful.
Once you swap out the sample producer script for a real feed of human-generated comments tagged as either harmful or not harmful, you’ll have a constantly updated database that can be used to check comments in the future.
Conclusion
The combination of Redpanda Serverless and Redpanda Connect makes setting up AI infrastructure super simple. This example is just the tip of the iceberg. Redpanda Connect makes it easy to connect any of your streaming data sources, not just Pinecone, so you can focus on working on your codebase.
To start streaming data in seconds with Redpanda, sign up for a free trial and take it for a spin. If you have questions, just ask the team in the Redpanda Community on Slack.
Related articles
VIEW ALL POSTSLet's keep in touch
Subscribe and never miss another blog post, announcement, or community event. We hate spam and will never sell your contact information.


