


Real-time Change Data Capture with Redpanda Connect and MySQL
Stream every insert, update, and delete from your database the moment it happens
Learn how to use ksqlDB with Redpanda to create a real-time materialized cache.


You can integrate ksqlDB with Redpanda to build a materialized cache for quick access to data. This tutorial walks you through creating this cache using Redpanda, ksqlDB server, and ksqlDB CLI, and shows you how to query it. The steps include installing Redpanda and ksqlDB, configuring ksqlDB to ingest data from Redpanda, creating a stream, creating materialized views, adding mock data, and running queries.
Before setting up ksqlDB and Redpanda, you need to have Docker and Docker Compose installed. It's also recommended to have familiarity with Apache Kafka or other messaging systems for Redpanda, and familiarity with SQL syntax for ksqlDB.
ksqlDB is an event-streaming database that simplifies real-time application building by integrating two Apache KafkaⓇ API components — Kafka ConnectⓇ and Kafka StreamsⓇ — into a single system. Unlike other popular data-processing tools like Flink or Apache SparkⓇ, ksqlDB allows you to build complete streaming applications with only a small set of SQL statements, eliminating the need to write Java/Scala/Python in addition to SQL statements.
Organizations often need to build real-time data-processing applications. Specialized tools for stream processing can help build such applications. In another article, you learned how to process data streams with Apache FlinkⓇ . This article will show you how to do something similar with ksqlDB.
ksqlDB is an event-streaming database that simplifies real-time application building with two Apache KafkaⓇ API components — Kafka ConnectⓇ and Kafka StreamsⓇ — into a single system. This makes it possible to integrate the stream-processing application with different source systems.
With ksqlDB, you can use SQL queries for processing streaming data. Examples of such use cases include identifying anomalies in real-time data, log monitoring, tracking, and alerting. Using ksqlDB on top of Redpanda, which is API-compatible with Kafka, allows you to explore topics, transform data within topics, copy existing topics from one format to another, and more.
ksqlDB differs from other popular data-processing tools like Flink or Apache SparkⓇ in its ability to build complete streaming applications with only a small set of SQL statements—you don’t need to write Java/Scala/Python in addition to SQL statements when using ksqlDB.
ksqlDB has a simplified architecture and is deployed as a separate, scalable cluster. The interface for event capturing, processing, and query serving is combined into a single system.
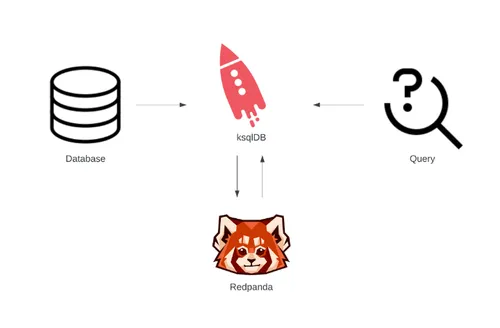
Let’s take a look at how Redpanda and ksqlDB can be used together to build a stream-processing application.
To set the scene, imagine that you have a database that stores emergency calls made by residents of different locations. It contains their names, emergency type, and area code. You frequently make a few specific queries, and you want to move those out of the database, precompute them, and store the results for fast access. Here, you can leverage the power of ksqlDB (computing) with Redpanda (storage) to build a materialized cache for quick access to the data.
This tutorial will walk you through creating this materialized cache using Redpanda, ksqlDB server, and ksqlDB CLI and show you how to query it.
Specifically, you’ll learn how to do the following:
Before getting started, you’ll need to have the following:
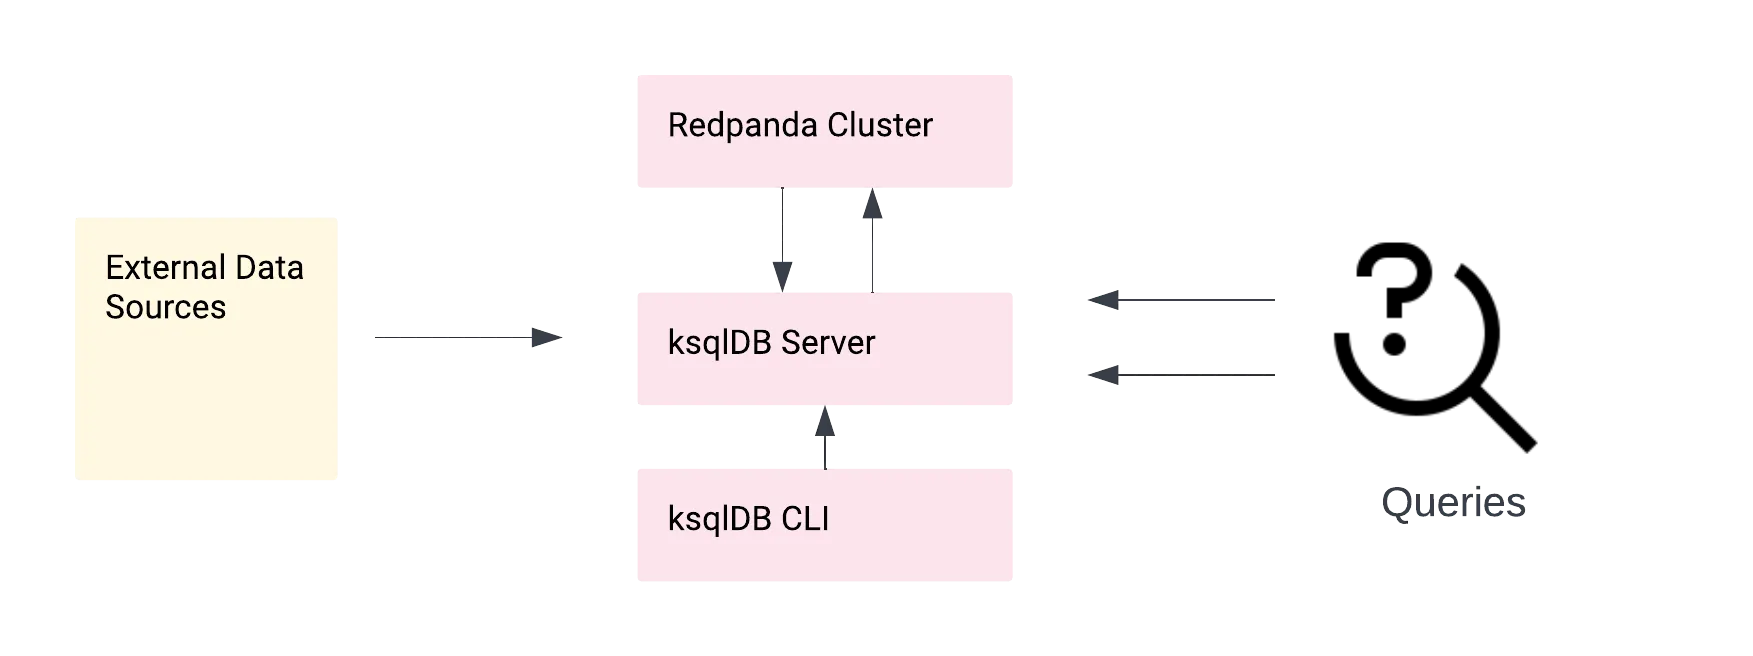
The image below is a schematic view of data flow within the system you’d use to process external data. To connect to the external sources, you’d have to set up your connectors. This tutorial doesn’t connect to any external source and uses mock data for the sake of simplicity.
You can follow the detailed steps for installing Redpanda from the official documentation on your platform of choice. In this tutorial, you’ll install Redpanda using Docker Compose.
First, add the following configurations to a docker-compose.yml file to install Redpanda from its Docker image:
version: '3.9'
services:
  redpanda:
    command:
    - redpanda
    - start
    - --smp
    - '1'
    - --reserve-memory
    - 0M
    - --overprovisioned
    - --set
    - redpanda.cluster_id=turning-red
    - --set
    - redpanda.enable_idempotence=true
    - --set
    - redpanda.enable_transactions=true
    - --set
    - redpanda.auto_create_topics_enabled=true
    - --node-id
    - '0'
    - --kafka-addr
    - PLAINTEXT://0.0.0.0:29092,OUTSIDE://0.0.0.0:9092
    - --advertise-kafka-addr
    - PLAINTEXT://redpanda:29092,OUTSIDE://localhost:9092
    image: docker.vectorized.io/vectorized/redpanda:v21.11.11
    container_name: redpanda
    ports:
    - 9092:9092
    - 29092:29092
Next, run the command below in the root directory of your docker-compose file to start a local Redpanda cluster:
docker-compose up -d
Now that your Redpanda cluster is running, you can do some test streaming.
Run the command below to access the Redpanda Docker container’s command line:
docker exec -it redpanda /bin/sh
Then run the following command to create a calls topic (note the use of the rpk command-line utility for Redpanda):
$ rpk topic create calls --brokers=localhost:9092
Next, produce a message on the topic:
$ rpk topic produce calls --brokers=localhost:9092
Input some text into the topic, and once you’re finished, press Ctrl+C to exit the prompt.
Finally, consume the messages on the topic:
$ rpk topic consume calls --brokers=localhost:9092Below is a sample output when consuming the messages:
##Output
{
  "topic": "calls",
  "value": "3",
  "timestamp": 1650692216007,
  "partition": 0,
  "offset": 2
}
That’s it! You now have enough Redpanda knowledge to leverage the power of ksqlDB. Before moving on, do some cleanup by running the following command:
docker compose down
This command stops and removes the Redpanda container.
First, add the services below in your docker-compose.yml file:
 ksqldb-server:
    image: confluentinc/ksqldb-server:0.25.1
    hostname: ksqldb-server
    container_name: ksqldb-server
    depends_on:
      - redpanda
    ports:
      - "8088:8088"
    environment:
      KSQL_LISTENERS: "http://0.0.0.0:8088"
      KSQL_BOOTSTRAP_SERVERS: "redpanda:29092"
      KSQL_KSQL_SCHEMA_REGISTRY_URL: "http://schema-registry:8081"
      KSQL_KSQL_LOGGING_PROCESSING_STREAM_AUTO_CREATE: "true"
      KSQL_KSQL_LOGGING_PROCESSING_TOPIC_AUTO_CREATE: "true"

  ksqldb-cli:
    image: confluentinc/ksqldb-cli:0.25.1
    container_name: ksqldb-cli
    depends_on:
      - redpanda
      - ksqldb-server
    entrypoint: /bin/sh
    tty: true
This code snippet creates two containers—the ksqlDB server and ksqlDB CLI—from their respective Docker images. The ksqlDB server is where your application runs, and the ksqlDB CLI allows you to interact with the server.
Then run the command below in the root directory of your docker-compose.yml file to start all three services:
docker-compose up -d
Finally, run the following command to check if the containers are running as expected:
docker stats
If everything is okay, you should have three containers running: ksqldb-cli, ksqldb-server, and redpanda.
To start ksqlDB and access its interface, run the command below:
docker exec -it ksqldb-cli ksql http://ksqldb-server:8088
You should see something similar to this:
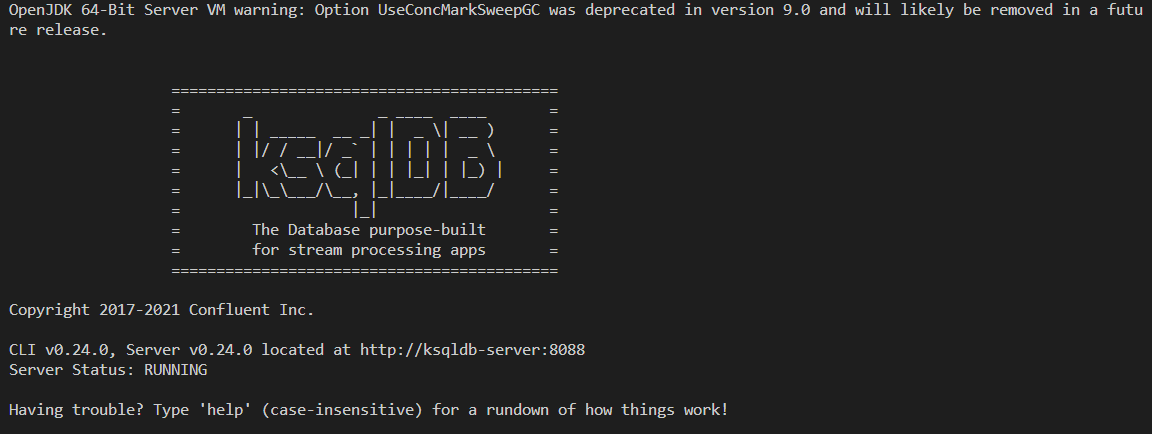
If the server isn’t responding, give it a while, exit the ksqlDB CLI, and then retry.
Now that your stack is running, it’s time to execute some ksqlDB code. You’ll use the ksqlDB CLI to interact with the server.
Before you create your stream, enter the command below in the running instance of ksqlDB CLI:
SHOW TOPICS;
This displays a list of existing topics. At this point, you will see only default topics. You can now create a stream that matches the data in your database as shown below:
CREATE STREAM emergencies (name VARCHAR, reason VARCHAR, area VARCHAR)
  WITH (kafka_topic='call-center', value_format='json', partitions=1);
This command creates not only a stream but also a Redpanda topic named call-center, if it does not already exist. If the topic does already exist, the command defines the stream, which can then be selected from with SQL syntax.
Running the SHOW TOPICS; command displays the newly created topic.
To keep track of certain logic, you need to create a materialized view for the logic. Run the following commands in the ksqlDB CLI instance to do so.
The location_of_interest materialized view counts the number of distinct areas, identifies the latest area of the emergency call, and then groups the rows returned by the reason for the call:
// RUN 1
CREATE TABLE location_of_interest AS
    SELECT reason,
           count_distinct(area) AS distinct_pings,
           latest_by_offset(area) AS last_location
    FROM emergencies
    GROUP BY reason
    EMIT CHANGES;
The call_record materialized view counts the number of times a resident called based on the reason and groups them by the resident’s name:
// RUN 2
CREATE TABLE call_record AS
    SELECT name,
           count(reason) AS total_emergencies
    FROM emergencies
    GROUP BY name
    EMIT CHANGES;
Now that you have a topic, a stream linked to your topic, and a materialized view to make your queries persistent, you can add some mock data to test your application.
First, open a new terminal and open the Redpanda terminal using the following command:
docker exec -it redpanda /bin/sh
Then you can produce messages on the topic:
$ rpk topic produce call-center --brokers=localhost:9092
Add the messages below in the terminal. Each message is produced to a partition and given a timestamp.
{"name":"Liam", "reason": "allergy", "area": "Florida"}
{"name":"Fiona", "reason": "dizziness", "area": "Orlando"}
{"name":"Mike", "reason": "pain", "area": "Florida"}
{"name":"Louise", "reason": "allergy", "area": "Orlando"}
{"name":"Steven", "reason": "stroke", "area": "New York"}
{"name":"Liam", "reason": "pain", "area": "Florida"}
{"name":"Louise", "reason": "dizziness", "area": "Hawai"}
{"name":"Ivor", "reason": "choking", "area": "New York"}
{"name":"Louise", "reason": "pain", "area": "Florida"}
{"name":"Beckham", "reason": "allergy", "area": "New York"}You are now ready to test your application by running some queries.
Before you run any query, set the property below to ensure the queries run from the beginning of the topic:
SET 'auto.offset.reset' = 'earliest';
To run a query that terminates immediately after it has returned the results, test with the following command:
SELECT * FROM location_of_interest
WHERE reason = 'allergy';
To run a query that keeps running and updates the results as more data comes in, use this command (note the use of the “EMIT CHANGES” clause):
SELECT * FROM call_record
WHERE name = 'Louise' EMIT CHANGES;
If you open a new ksqlDB server and add some more mock data, the query above will update with the new data.
You can view failed ksqlDB messages by adding the following statements in your docker-compose.yml file:
environment:
    …
    KSQL_LOG4J_ROOT_LOGLEVEL: "ERROR"
    KSQL_LOG4J_LOGGERS: "org.apache.kafka.connect.runtime.rest=WARN,org.reflections=ERROR"
    KSQL_LOG4J_PROCESSING_LOG_BROKERLIST: kafka:29092
    KSQL_LOG4J_PROCESSING_LOG_TOPIC: <ksql-processing-log-topic-name>
    KSQL_KSQL_LOGGING_PROCESSING_TOPIC_NAME: <ksql-processing-log-topic-name>
    KSQL_KSQL_LOGGING_PROCESSING_TOPIC_AUTO_CREATE: "true"
KSQL_KSQL_LOGGING_PROCESSING_STREAM_AUTO_CREATE: "true"To stop and remove the containers, run the command below:
docker-compose down
Now that you've been proprly introduced to ksqlDB and how to use it with Redpanda, you can take what you've learned in this tutorial and create a data stream-processing application with a materialized cache for any number of use cases.
As you saw, ksqlDB is easy to install and configure, and it lets you run standard SQL queries.
All the code in this tutorial can be found on GitHub. Try out Redpanda using the tutorial, interact with Redpanda’s developers directly in the Redpanda Community on Slack, or contribute to Redpanda’s source-available GitHub repo here. To learn more about everything you can do with Redpanda, check out our documentation here.
Subscribe to our VIP (very important panda) mailing list to pounce on the latest blogs, surprise announcements, and community events!
Opt out anytime.

