Full CDC semantics land in the Iceberg output for Redpanda Connect
Your lakehouse mirrors the database, instantly.

Build a real-time search application with Redpanda and ZincSearch, and process your business data the second it enters your system!


To build a real-time search application with Redpanda and ZincSearch, you need to follow these steps: 1. Run containerized Redpanda and ZincSearch services using Docker.2. Create a Redpanda topic using its rpk CLI (Command Line Interface).3. Develop a Python application that uses the kafka-python library to produce real-time orders data into the Redpanda topic.4. Develop a consumer code to consume the data from the topic and write them into the ZincSearch index in real-time.5. Use ZincSearch UI and APIs to search the data persisted in ZincSearch.
To create a Redpanda topic, open a terminal and connect to Redpanda’s container session by executing the command docker exec -it redpanda bash. Then, execute the command rpk topic create orders to create the topic named orders. You can check the existence of the created topic with the command rpk topic list.
To start Redpanda and ZincSearch services, create a project directory in your machine and create subdirectories for your Python app and ZincSearch data. Then, create a docker-compose.yaml file and execute the command docker-compose up -d to start the services. You can check if these services are running by executing the command docker ps.
Before setting up a real-time search application with Redpanda and ZincSearch, you need to have Docker installed on your machine, exposure to Docker and Python programming, and Python 3.8 or the latest version installed.
ZincSearch is an open-source distributed search and analytics engine that serves as a replacement for Elasticsearch. It supports handling data ingestion operations and favors a schema-less design, meaning that various documents in the same index can have different fields without the need to declare the schema upfront. It supports text, numerical, geographical, structured, and unstructured data. It can be used in a variety of use cases, including traditional full-text search engines, log aggregation and search, application search, and more.
One of the most in-demand skills today is business agility, especially if you work in cloud-native environments. Every business produces data at a rapid rate, and some of it could indicate major changes in your company's value. It’s more crucial than ever to be able to respond quickly to any event data.
However, processing event data is a prerequisite for responding to it. Real-time processing of the data as it enters your streaming system is the quickest way to do this. A real-time analytical system of data pipelines can distribute your data for analytics, allowing you to prepare and measure data as soon as it enters your system. The integration of Redpanda and ZincSearch enables you to store and index that data for search, which improves your business decision-making process.
A replacement for Elasticearch, ZincSearch is an open-source distributed search and analytics engine. For those who are already experienced with Elasticsearch, ZincSearch APIs are fully compatible with Elasticsearch APIs when it comes to handling data ingestion operations. ZincSearch favors schema-less design, meaning various documents in the same index can have different fields, and there is no need to declare the schema upfront. Moreover, text, numerical, geographical, structured, and unstructured data are all supported by ZincSearch.
You can use ZincSearch in a variety of use cases, including the creation of traditional full-text search engines, log aggregation and search, application search, and so on. Combine it with a real-time streaming platform like Redpanda, and you get real-time search capability in a real-time data processing environment.
Let’s walk through how to build a real-time search application with Redpanda and ZincSearch:
Before you begin, make sure you’re up to speed in these areas:
For the purposes of this tutorial, imagine that you’re employed as a technical advisor at the fictitious e-commerce entity, ShopThroughUs.
ShopThroughUs struggles to scan through its daily influx of more than a million orders and extract useful data from it. They need a system that enables full-text searching for orders, as well as the ability to perform analytical operations. This feature has to be accessible in real-time so that when the business team needs to make a crucial decision, your technical or support team can quickly search for the required information.
You select Redpanda for the stack's data-streaming component, ZincSearch for search functionality, and a Python-based application to integrate Redpand with ZincSearch.

To begin, create a project directory, real-time-search-application-with-redpanda-and-zincsearch, in your machine. Create subdirectories orders-app and zincsearch in it. The orders-app directory will hold the Python app, and the zincsearch directory will store the data pushed to ZincSearch.
Create a file named docker-compose.yaml and paste the following content:
---
version: '3.9'
services:
  zincsearch:
    container_name: zincsearch
    image: public.ecr.aws/zinclabs/zinc:latest
    ports:
    - "4080:4080"
    environment:
      ZINC_DATA_PATH: "/data"
      ZINC_FIRST_ADMIN_USER: "admin"
      ZINC_FIRST_ADMIN_PASSWORD: "admin"
    volumes:
      - ./zincsearch/data:/data
    networks:
      - redpanda-zincsearch-network

  redpanda:
    image: vectorized/redpanda
    container_name: redpanda
    ports:
      - "9092:9092"
    command:
      - redpanda
      - start
      - --overprovisioned
      - --smp
      - "1"
      - --memory
      - "1G"
      - --reserve-memory
      - "0M"
      - --node-id
      - "0"
      - --kafka-addr
      - PLAINTEXT://0.0.0.0:29092,PLAINTEXT_HOST://0.0.0.0:9092
      - --advertise-kafka-addr
      - PLAINTEXT://redpanda:29092,PLAINTEXT_HOST://host.docker.internal:9092
      - --check=false
    networks:
      - redpanda-zincsearch-network

networks:
  redpanda-zincsearch-network:
    external: false
The above docker-compose.yaml file contains the service definition of both Redpanda and ZincSearch. Execute the command docker-compose up -d to start these services.
To check if these services are up and running, execute the command docker ps. You’ll see an output like these if the services are running:
CONTAINER ID   IMAGE                                 COMMAND                  CREATED         STATUS         PORTS                                             NAMES

effd71da4fdf   public.ecr.aws/zinclabs/zinc:latest   "/go/bin/zinc"           9 seconds ago   Up 6 seconds   0.0.0.0:4080->4080/tcp                            zincsearch

b754ca13318e vectorized/redpanda "/entrypoint.sh redp…" 9 seconds ago Up 6 seconds 8081-8082/tcp, 9644/tcp, 0.0.0.0:9092->9092/tcp redpandaYou can access the URL http://localhost:4080/ in your browser to access the ZincSearch UI.
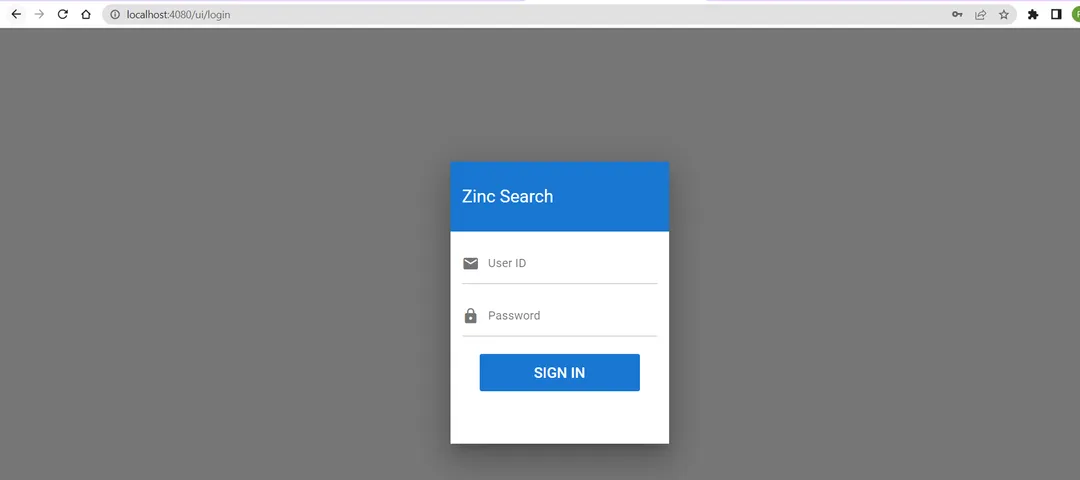
Use the default username, admin, and password to login as an admin. You should see the homepage of ZincSearch:
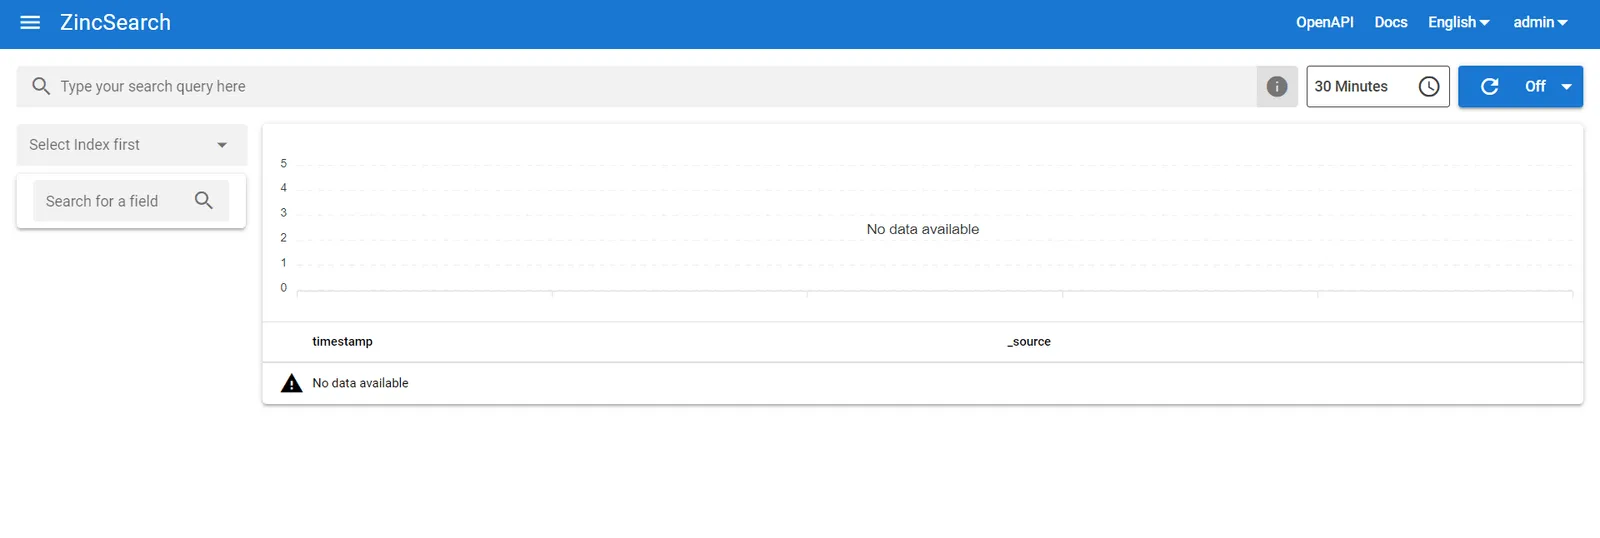
At this point, you don’t have any data available in ZincSearch to search for. That’s your next course of action, to bring the data into ZincSearch through a real-time streaming process.
You need to create a topic in Redpanda to receive events from the Python app. Open a terminal and connect to Redpanda’s container session by executing the command docker exec -it redpanda bash. You should see your terminal session connected now to the redpanda container:
redpanda@b754ca13318e:/$
Execute the command rpk topic create orders to create the topic named orders. You can check the existence of the created topic with the command rpk topic list. You should see an output like this:
NAME    PARTITIONS  REPLICAS
orders 1 1Now that the redpanda and zincsearch services are running and you have a topic available in the redpanda container to receive the events, move on to create a Python app to generate and consume messages.
This will be a two-step process:
zincsearch container.Before creating a producer and consumer code, you need to have your Python virtual environment set up and dependencies installed.
Switch to the orders-app subdirectory in the project. Execute the command python -m venv venv to create a dedicated virtual environment setup for this demo project. You should now see a directory created with the name venv under the orders-app directory.
Create a file named requirements.txt in the orders-app directory and paste the following content:
kafka-python==2.0.2
requests==2.28.1
Execute the command pip install -r requirements.txt to install the dependencies. Among the dependencies, kafka-python is used to interact with Kafka, and the requests library is used to make an API call.
Later, you’ll use the requests library methods to call ZincSearch APIs from the consumer code to ingest the data into ZincSearch.
Create a producer code that generates sample orders data of format:
{"order_id": 1, "sales_value": 323}
{"order_id": 2, "sales_value": 594}
Each event holds the order ID and corresponding sales value. Create a directory named src in the orders-app subdirectory. You’ll create all Python source code files in this directory. Create a file named config.py and paste the following Python code:
# Common Config
TOPIC = "orders"
BOOTSTRAP_SERVER = ['localhost:9092']

# Consumer code related config
GROUP_ID = "orders-cg-1"

# ZincSearch config
ZINCSEARCH_SERVER = "http://localhost:4080/"
INDEX = "orders"The above config.py file contains the configuration required for the Python app, like the Redpanda URL, topic name, ZincSearch URL, and so on. Next, create a file named kafka_producer.py in the same location and paste the following Python code:
import time

from kafka import KafkaProducer

from config import BOOTSTRAP_SERVER, TOPIC
import orders

def string_serializer(data):
    return str(data).encode("utf-8")

producer = KafkaProducer(bootstrap_servers=BOOTSTRAP_SERVER,
                         value_serializer=string_serializer, key_serializer=string_serializer)

if __name__ == "__main__":

    while True:
        message_key = 0
        message = orders.get_order_details()
        print(message)
        producer.send(topic=TOPIC, value=message, key=message_key)
        message_key = message_key+1
        time.sleep(3)

        # Wait until all async messages are sent
producer.flush()The above producer code calls the method get_order_details in the Python module orders.py to generate the sample order details and then publish those order details into the orders topic in Redpanda.
Let’s move on to create a file named orders.py and paste the following code:
import random
import json

order_id = 0

def get_order_details():
    global order_id
    order_id = order_id + 1
    sales_value = random.randint(10,1000)

return json.dumps({"order_id" : order_id, "sales_value": sales_value})With this, the orders-app is ready to produce the orders data in a continuous manner. After the consumer code is ready for this demo, you’ll run the producer.
To consume orders data from the orders topic, create a file named kafka_consumer.py and paste the following code:
from kafka import KafkaConsumer
from config import TOPIC, BOOTSTRAP_SERVER, GROUP_ID, ZINCSEARCH_SERVER, INDEX
import base64
import requests

# To consume the latest messages from the given topic and auto-commit offsets
consumer = KafkaConsumer(TOPIC,
                         group_id=GROUP_ID,
                         bootstrap_servers=BOOTSTRAP_SERVER,
                         auto_offset_reset='earliest')

user = "admin"
password = "admin"
bas64encoded_creds = base64.b64encode(bytes(user + ":" + password, "utf-8")).decode("utf-8")
headers = {"Content-type": "application/json", "Authorization": "Basic " + bas64encoded_creds}
ZINC_URL = ZINCSEARCH_SERVER + "api/" + INDEX + "/_doc"

for message in consumer:
    # message value and key are raw bytes -- decode if necessary!
    # e.g., for unicode: `message.value.decode('utf-8')`
    print("%s:%d:%d: key=%s value=%s" % (message.topic, message.partition,
                                         message.offset, message.key.decode("utf-8"),
                                         message.value.decode("utf-8")))

    data = message.value.decode("utf-8")

requests.post(ZINC_URL, headers=headers, data=data)After consuming the orders data from the orders topic, the above consumer code will call the ZincSearch POST endpoint to ingest the data into the orders index of ZincSearch. To make this POST request, the app uses the requests library.
With that, you’re done with the entire app setup!
Next, start the producer to publish the data to the orders topic. Switch to the src directory where the app-related Python files exist, and in a terminal, execute the command python kafka_producer.py.
You should see the orders data getting published in your terminal:
{"order_id": 1, "sales_value": 323}
{"order_id": 2, "sales_value": 594}
{"order_id": 3, "sales_value": 351}
{"order_id": 4, "sales_value": 241}
{"order_id": 5, "sales_value": 170}
{"order_id": 6, "sales_value": 954}
{"order_id": 7, "sales_value": 969}
Keep this producer process running in your terminal.
Next, start the consumer to consume the data from the orders topic. Open another terminal, switch to the src directory, and in a terminal, execute the command python kafka_consumer.py.
You should see the orders data getting consumed in your terminal:
orders:0:17: key=0 value={"order_id": 1, "sales_value": 344}
orders:0:18: key=0 value={"order_id": 2, "sales_value": 495}
orders:0:19: key=0 value={"order_id": 3, "sales_value": 730}
orders:0:20: key=0 value={"order_id": 4, "sales_value": 923}
orders:0:21: key=0 value={"order_id": 5, "sales_value": 46}
orders:0:22: key=0 value={"order_id": 6, "sales_value": 659}
orders:0:23: key=0 value={"order_id": 7, "sales_value": 864}
orders:0:24: key=0 value={"order_id": 8, "sales_value": 948}
orders:0:25: key=0 value={"order_id": 9, "sales_value": 927}Keep this consumer process running in your terminal.
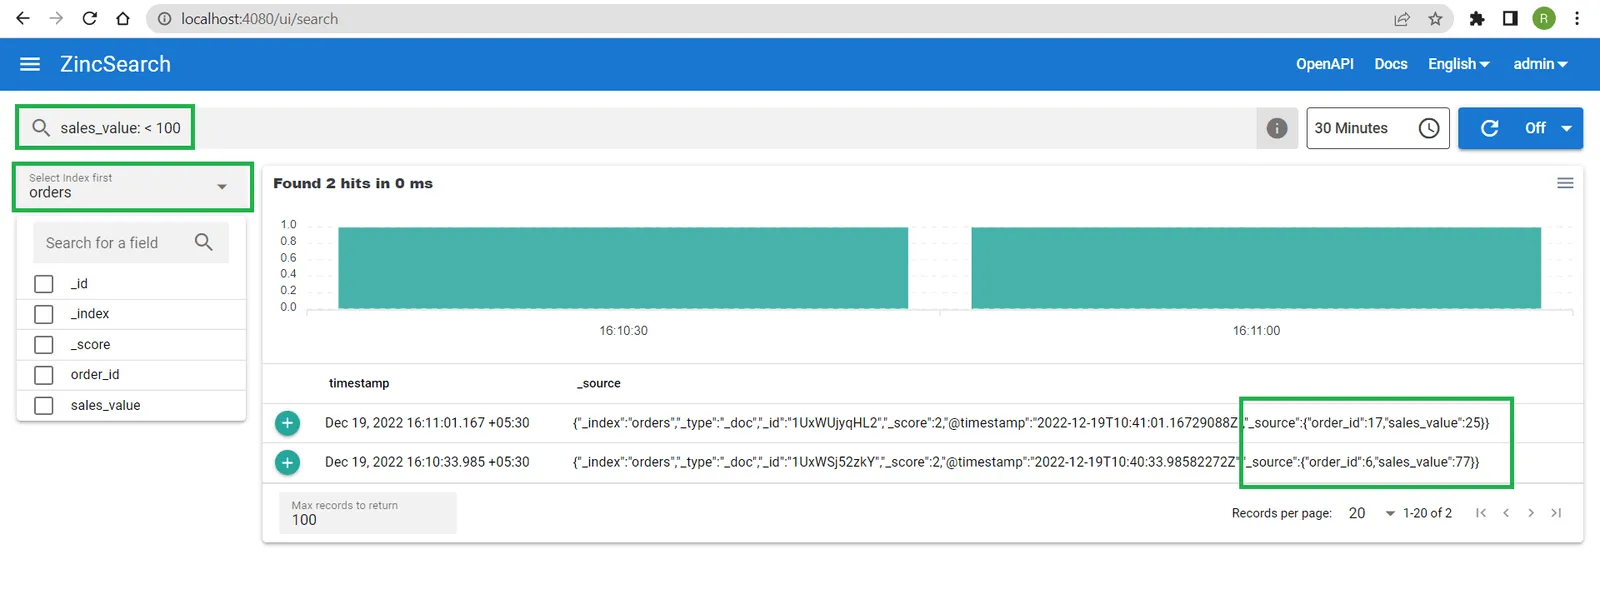
Your producer is generating orders data, and the consumer is consuming the data in real time and pushing it to ZincSearch. It’s time to open up the ZincSearch UI.
Access the URL http://localhost:4080/ in a browser. From the Select Index dropdown option, select the orders index. In the search bar, enter the criteria as sales_value: < 100. This should show you the orders with a sales_value of less than 100.
You can also search for the documents in ZincSearch index by using the search endpoints. Open a terminal and connect to the redpanda container session using the command docker exec -it redpanda bash.
From the redpanda container terminal, execute the following command to show any two records of orders:
curl -X POST http://zincsearch:4080/api/orders/_search -H 'Content-Type: application/json' -u admin:admin -d '{"max_results": 2}'
As per the search request, you should see an output like this:
{
   "took":0,
   "timed_out":false,
   "_shards":{
      "total":3,
      "successful":3,
      "skipped":0,
      "failed":0
   },
   "hits":{
      "total":{
         "value":642
      },
      "max_score":1,
      "hits":[
         {
            "_index":"orders",
            "_type":"_doc",
            "_id":"1UxWSj52zkY",
            "_score":1,
            "@timestamp":"2022-12-19T10:40:33.98582272Z",
            "_source":{
               "order_id":6,
               "sales_value":77
            }
         },
         {
            "_index":"orders",
            "_type":"_doc",
            "_id":"1UxWSj0do7S",
            "_score":1,
            "@timestamp":"2022-12-19T10:40:33.963191552Z",
            "_source":{
               "order_id":2,
               "sales_value":561
            }
         }
      ]
   }
}There you have it. You’ve made an end-to-end integration of Redpanda with ZincSearch using a Python app. The app generates and consumes real-time data from Redpanda and ingests the data in real-time into ZincSearch. You could either use ZincSearch UI or its APIs to interact with ZincSearch.
As you’ve seen in this demo project, integrating ZincSearch with Redpanda opens up several possibilities for real-time data streaming and search applications.
You can find the source code for this article in this GitHub repository. If you want to understand more about ZincSearch, check out ZincSearch’s official documentation. To understand the nuts and bolts of how the Redpanda platform works, check out Redpanda’s official documentation, investigate their blogs or join the Redpanda Community on Slack to chat with their solution architects and core engineers.
And remember, you can always take Redpanda's free Community edition for a test drive!
Subscribe to our VIP (very important panda) mailing list to pounce on the latest blogs, surprise announcements, and community events!
Opt out anytime.