

Apache Kafka tutorial—a deep dive


Apache Kafka tutorial
LinkedIn’s rapid growth in the early 2010s meant the company suddenly had to process large data volumes from the interactions of millions of new users. They needed a high throughput data ingestion system that did not compromise data integrity.
Traditional messaging systems created performance bottlenecks and struggled to scale. LinkedIn developed a new solution: Apache Kafka®, a distributed platform that facilitates real-time data feeds in a robust and fault-tolerant manner.
Kafka uses a publish-subscribe (pub-sub) messaging model to facilitate decoupled communication. Producers publish messages to categorized feeds called topics. Consumers subscribe to specific topics, receiving only relevant messages. Decoupling allows Kafka to scale horizontally as needed to meet both producer and consumer requirements.
In the previous chapters of this guide, we covered core concepts of Kafka architecture—producers, consumers, brokers, topics, and partitions. A single Kafka server is called a broker, and brokers operate as part of a cluster. Kafka organizes messages into topics and divides topics into partitions to distribute data across the cluster for redundancy. If one broker fails, the remaining brokers can continue processing messages. Kafka automatically rebalances partitions among the remaining brokers to minimize downtime and ensure data availability.
This chapter focuses on installation and getting started. By the end of this tutorial, you'll be able to:
- Set up a local Kafka environment for development purposes.
- Write simple producer and consumer applications to send and receive messages.
- Explore best practices for optimal performance when configuring consumers and producers.
Summary of key Kafka concepts
Let's begin by establishing a foundation with a table summarizing key Kafka concepts:
Installation guide
The official Kafka guide explains UNIX-based operating systems. We focus on setting up Kafka on a Windows machine.
Pre-requisites
Make sure that Java 8+ is installed in your local environment. Then, verify the version using the java -version command. Go to Kafka - Download and download the latest binary release.
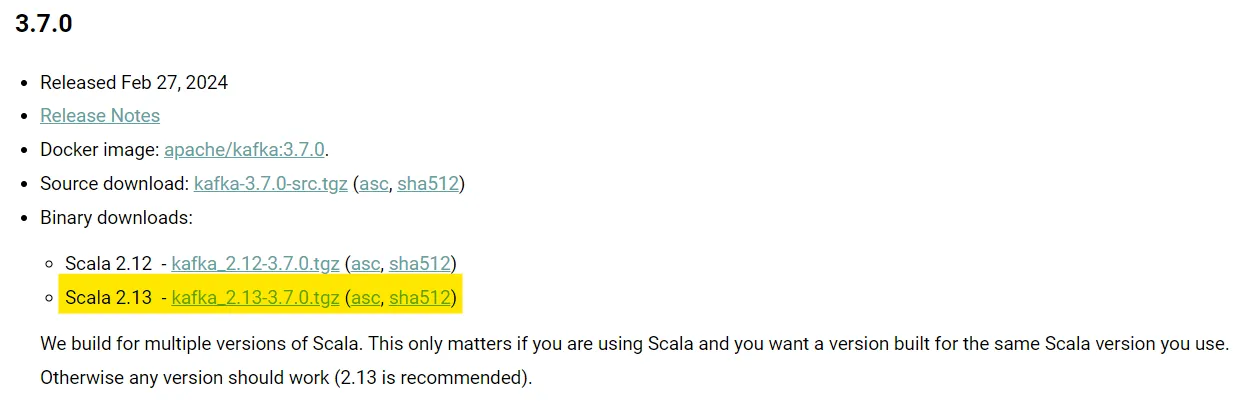
When writing this guide, the latest versions were Scala 2.13 for Kafka 3.7.0. Extract the downloaded files in your desired location. Add the KAFKA_HOME variable in Environment Variables and set it to the directory where you placed the Kafka extract.
Getting Kafka and ZooKeeper running on Windows
Windows runs programs using batch files (.bat) instead of shell scripts (.sh). The Kafka installation provides these batch files specifically for Windows.
Start ZooKeeper—Open CMD, navigate to your Kafka directory, and run the below.
bin\windows\zookeeper-server-start.bat .\config\zookeeper.propertiesStart Kafka—Open another terminal window and run the below.
bin\windows\kafka-server-start.bat .\config\server.propertiesOnce Kafka and ZooKeeper run, you can verify their functionality by sending and receiving messages via a topic in a terminal window.
Use the below command to create a topic from CMD.
.\bin\windows\kafka-topics.bat --create --topic redpanda-demo --bootstrap-server localhost:9092Send a message to the newly created <redpanda-demo> topic.
.\bin\windows\kafka-console-producer.bat --topic redpanda-demo --bootstrap-server localhost:9092Use the below command to receive a message that you just sent as a producer:
./bin/windows/kafka-console-consumer.bat --topic redpanda-demo --from-beginning --bootstrap-server localhost:9092Run producer and consumer applications
Now that Kafka is set up, let's look at the code for the producer and consumer applications. The producer API allows producers to publish messages to topics, configure message serialization formats, set compression options, and control message acknowledgment behavior.
The SimpleProducer class in the code below demonstrates a basic Kafka Producer. It sends a series of messages to the specified Topic. The Producer configurations include details such as the Kafka server address and message serialization format.
import org.apache.kafka.clients.producer.KafkaProducer;
import org.apache.kafka.clients.producer.ProducerRecord;
import org.apache.kafka.clients.producer.ProducerConfig;
import org.apache.kafka.common.serialization.StringSerializer;
import java.util.Properties;
public class SimpleProducer {
    public static void main(String[] args) {
        // Topic name to which messages will be sent
        String topicName = "redpanda-demo";

        // Configuring Producer properties
        Properties props = new Properties();
        props.put(ProducerConfig.BOOTSTRAP_SERVERS_CONFIG, "localhost:9092");
        props.put(ProducerConfig.KEY_SERIALIZER_CLASS_CONFIG, StringSerializer.class.getName());
        props.put(ProducerConfig.VALUE_SERIALIZER_CLASS_CONFIG, StringSerializer.class.getName());

        // Creating a Kafka Producer with specified properties
        KafkaProducer<String, String> producer = new KafkaProducer<>(props);

        // Sending 10 messages to the specified Topic
        for (int i = 0; i < 10; i++) {
            producer.send(new ProducerRecord<>(topicName, Integer.toString(i), "Message " + i));
            System.out.println("Sent message: " + "Message " + i);
        }

        // Closing the Producer to free resources
        producer.close();
    }
}
Similarly, the consumer API enables subscribing to topics, defining message deserialization formats, managing consumer offsets, and configuring consumer groups.
The SimpleConsumer class in the code below demonstrates a basic Kafka Consumer. It subscribes to a specified topic and continuously polls for new messages. The Consumer configurations include details such as Kafka server address, consumer group ID, message deserialization format, and the offset reset policy.
import org.apache.kafka.clients.consumer.KafkaConsumer;
import org.apache.kafka.clients.consumer.ConsumerRecord;
import org.apache.kafka.common.serialization.StringDeserializer;
import java.time.Duration;
import java.util.Collections;
import java.util.Properties;
public class SimpleConsumer {
    public static void main(String[] args) {
        // Topic name to which the Consumer will subscribe
        String topicName = "redpanda-demo";

        // Configuring Consumer properties
        Properties props = new Properties();
        props.put(ConsumerConfig.BOOTSTRAP_SERVERS_CONFIG, "localhost:9092");
        props.put(ConsumerConfig.GROUP_ID_CONFIG, "test");
        props.put(ConsumerConfig.AUTO_OFFSET_RESET_CONFIG, "latest");
        props.put(ConsumerConfig.KEY_DESERIALIZER_CLASS_CONFIG, StringDeserializer.class.getName());
        props.put(ConsumerConfig.VALUE_DESERIALIZER_CLASS_CONFIG, StringDeserializer.class.getName());

        // Creating a Kafka Consumer with the specified properties
        KafkaConsumer<String, String> consumer = new KafkaConsumer<>(props);

        // Subscribing to the specified Topic
        consumer.subscribe(Collections.singletonList(topicName));

        // Continuously polling for new messages
        try {
            while (true) {
                ConsumerRecords<String, String> records = consumer.poll(Duration.ofMillis(100));
                for (ConsumerRecord<String, String> record : records) {
                    System.out.printf("Received message: Offset = %d, Key = %s, Value = %s%n",
                            record.offset(), record.key(), record.value());
                }
            }
        } finally {
            // Closing the Consumer to free resources
            consumer.close();
        }
    }
}
Compiling
Save the above code in two separate files named SimpleProducer.java and SimpleConsumer.java inside a new folder. Assuming you created the folder at the same level as your Kafka installation, compile the code with the following commands (update the library paths according to your directory structure).
javac -cp "D:\kafka_2.13-3.7.0\libs\*" SimpleProducer.java
javac -cp "D:\kafka_2.13-3.7.0\libs\*" SimpleConsumer.java
This will create two new .class files inside your directory. Now, with Kafka running in the background and a topic created, you can run the producer and consumer applications in two separate terminals.
This command starts the producer, sending messages to your chosen topic:
java -cp ".;D:\kafka_2.13-3.7.0\libs\*" SimpleProducerThis command starts the consumer listening for and displaying messages from the topic.
java -cp ".;D:\kafka_2.13-3.7.0\libs\*" SimpleConsumerExperiment with different configurations in the sample code, send messages, create new topics, and receive them via consumers.
Producer configurations
The producer has configurations to control various features such as acknowledgments, buffering, compression, and batching. You can set these configurations directly into the code or a separate properties file.
- acks: Controls the criteria under which requests are considered complete. Use
acks=1to ensure the message is written to the leader broker's disk, providing a balance between reliability and latency. For higher reliability, consideracks=all(or-1), where the message is only considered committed when it is written to all replicas. - compression.type: Sets the compression type of all data generated by the Producer. Valid values are ‘none,’ ‘gzip,’ ‘snappy,’ ‘lz4’, or ‘zstd’.
- batch.size: Allows producers to batch multiple messages together into fewer requests for efficient transmission over the network.
- buffer.memory: Controls the total bytes of memory the Producer can use to buffer records while waiting to be sent to the Topic.
- linger.ms: Controls how long the Producer waits before sending messages to the Topic.
You can configure these properties by adding the code below to the Producer Configurations section of the Producer Code.
// Configuring Additional Producer properties
// Ensure the message is written to all replicas
props.put(ProducerConfig.ACKS_CONFIG, "all");
// Use gzip compression
props.put(ProducerConfig.COMPRESSION_TYPE_CONFIG, "gzip");
// Batch size of 16 KB
props.put(ProducerConfig.BATCH_SIZE_CONFIG, 16384);
// Buffer memory size of 32 MB
props.put(ProducerConfig.BUFFER_MEMORY_CONFIG, 33554432);
// Wait up to 10ms before sending a batch
props.put(ProducerConfig.LINGER_MS_CONFIG, 10);
Consumer configurations
The consumer has configurations to control various features such as group management, offset handling, auto-commit, and session timeouts. You can set these configurations directly into the code or a separate properties file.
- fetch.min.bytes: Controls the minimum amount of data that consumer wants to receive from the broker when fetching records.
- max.poll.records: Controls the maximum number of records that a single call to poll() returns.
- partition.assignment.strategy: This specifies the consumer's strategy for assigning partitions to consumer group members. Strategy types include ‘Range,’ ‘RoundRobin,’ ‘Sticky,’ and ‘CooperativeSticky.’
- enable.auto.commit: This controls whether the consumer’s offsets are automatically committed. By default, it is set to ‘true’; you can set it to ‘false’ if you want to control when offsets are committed.
- session.timeout.ms: Specifies the timeout to detect consumer failures. The session is inactive if the specified time has passed and the consumer is out of contact with a broker.
You can configure these properties by adding the code below to the Consumer Configurations section of the Consumer Code.
// Configuring Additional Consumer properties
// Minimum amount of data (1KB) server returns in the fetch request
props.put(ProducerConfig.FETCH_MIN_BYTES_CONFIG, 1024);
// Maximum number of records returned in a single loop
props.put(ProducerConfig.MAX_POLL_RECORDS_CONFIG, 500);
// Specify the Partition strategy
props.put(ProducerConfig.PARTITION_ASSIGNMENT_STRATEGY_CONFIG, "org.apache.kafka.clients.consumer.RoundRobinAssignor");
// Set auto-commit flag(by default is true)
props.put(ProducerConfig.ENABLE_AUTO_COMMIT_CONFIG, ‘true’);
// Set the session timeout for consumer heartbeat
props.put(ProducerConfig.SESSION_TIMEOUT_MS_CONFIG, 10000);
Conclusion
Practical Kafka usage involves balancing factors like throughput, latency, and data durability based on your needs. Strict message ordering guarantees in Kafka can introduce some processing delays.
Additionally, the default message size is limited to 1MB. Achieving "exactly-once" delivery, where a message is processed only once by a consumer, requires additional configuration and trade-offs. It can impact performance or introduce complexity.
Redpanda is a source-available (BSL), Kafka API-compatible streaming data platform designed to be simpler to operate. It is faster, more affordable, and built with developers in mind. You can choose from self-deployed or serverless options and get started in seconds instead of days. You can also opt for enterprise-grade support and security for complete peace of mind.
To start streaming data in seconds, sign up for a free Serverless account.